Consider a data loss prevention strategy
What are data loss prevention strategies and why would you want some?
One of the coolest things about Power Platform is the amount of connectors that are available. Right now there are about 683 (August 3rd, 2022) and there are more every week. Despite not having their own icon, I consider connectors one of the backbones of Power Platform. With connectors you can use multiple data sources and services.
But with great power comes great responsibility and with such a huge amount of connectors there is always the possibility of unintentional data loss. Before our user have to figure out, which connectors are safe to use and which are not, we should use data loss prevention policies (DLPs) to make their and our life easier.
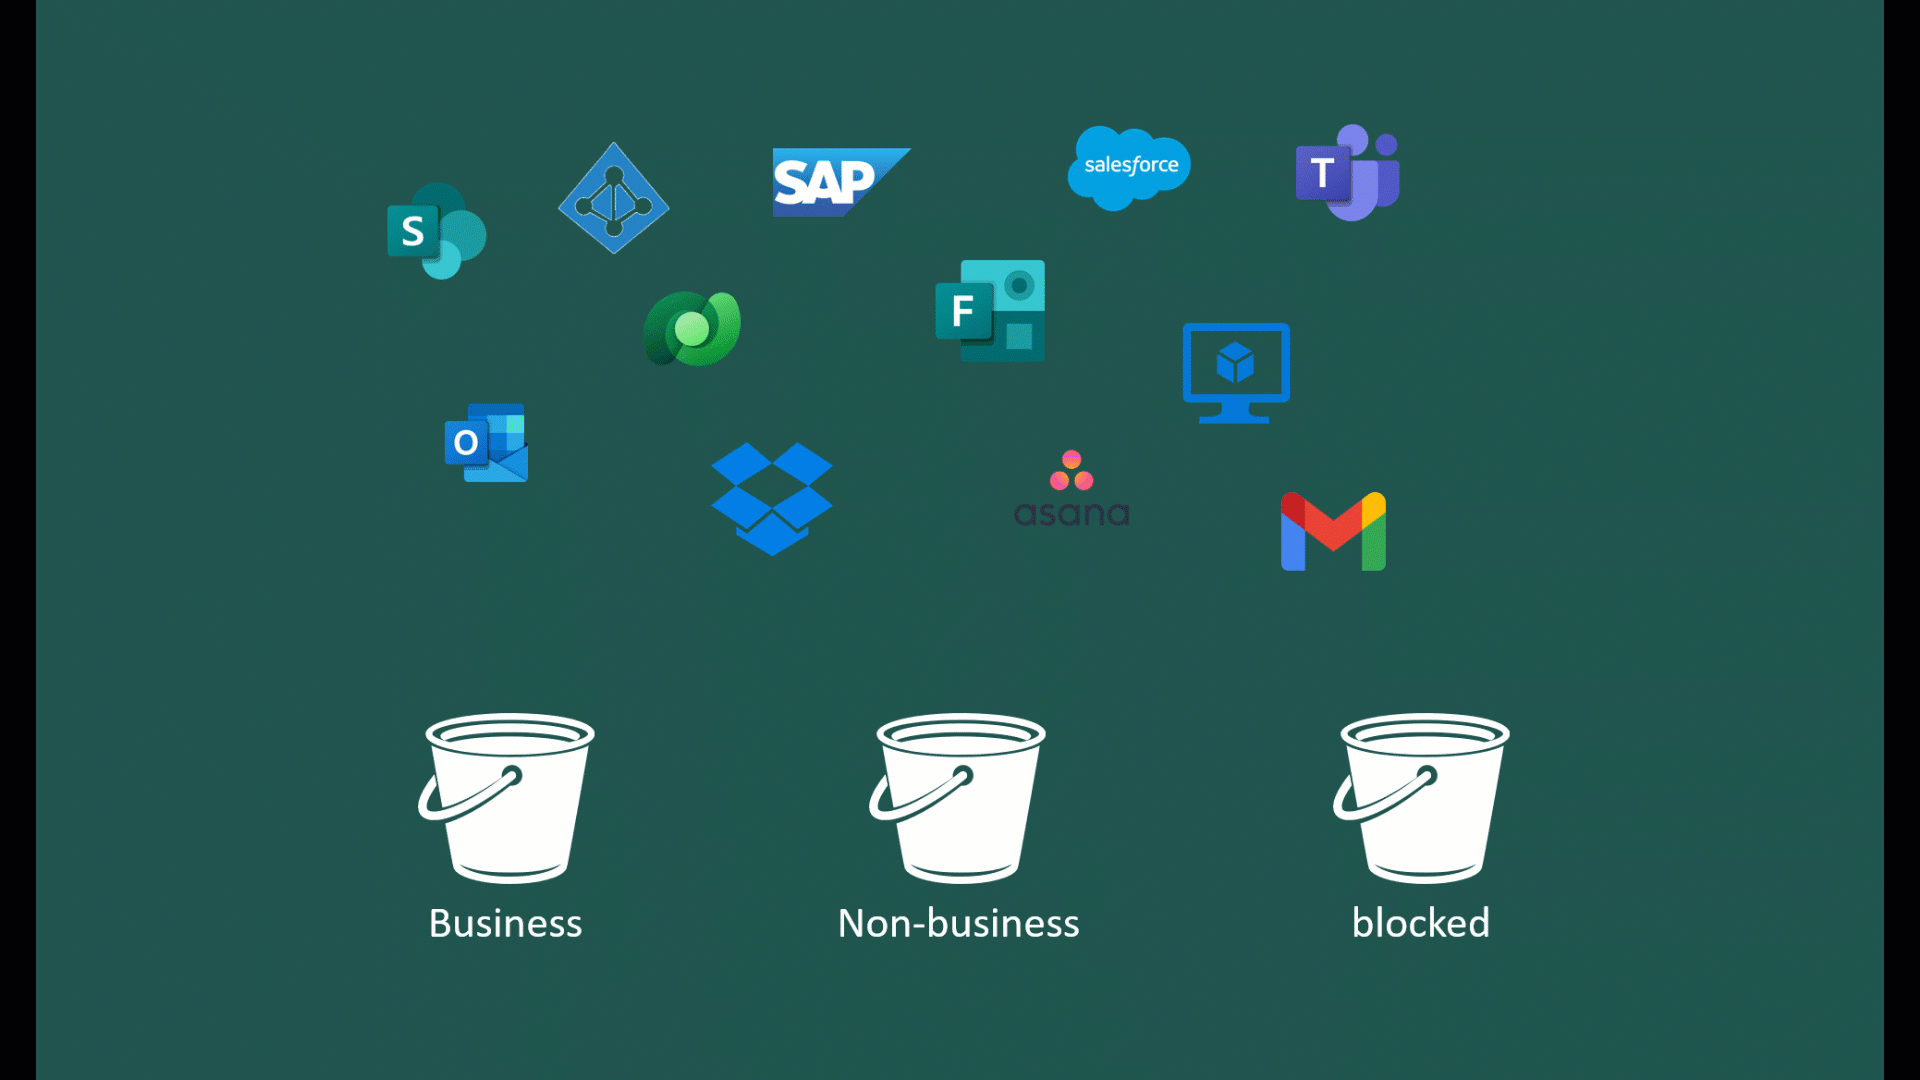
DLPs act as guardrails to help keep our data safe. With DLPs we can sort all the connectors in different buckets to determine which connectors can be used together, and which can’t be used at all. The three buckets or categories are:
- Business
- Non-business
- Blocked
The names Business and Non-business are just to help you categorize the connectors. They don’t have a further effect. The bucket blocked means, that all the connectors in there can’t be used at all. The connectors in the other two buckets can be used, but not with each other. This way you can ensure that critical business data is only used with the connectors that have been selected for it. For example, we may not want to use our database of critical business data with a social media connector. However, we still want our marketing team to be able to create flows and apps for social media content. So we use two different buckets. Then both connectors can be used, just not with each other.
DLPs can be used for the whole tenant or for single environments, so you can (and should) have multiple DLPs.
Start a DLP strategy
Now that we know what DLPs are, the questions remains, how a good DLP strategy looks like, right? And you might guess, what the answer is: It depends! (it always does 😂)
A good DLP strategy starts with a tenant wide DLP that is as restrictive as necessary and as open as possible. I always start to think about a default DLP that I’m comfortable with for every new environment that gets created. That’s my feel-good DLP. Since there are a few connectors that can’t be blocked at all, you should start with these (also check the chapter Set up a data loss prevention policy in the blog about the default environment).
After setting up a default DLP policy the strategy should go hand in hand with your environment strategy. If you have special environments set up for different business units, consider a special DLP, if necessary. If not, the default DLP policy is in place. I usually start with something like this:
- “Business as usual” - a DLP policy for everyday business, covering personal productivity but nothing more.
- “Develop something new” - a policy that allows more connectors to develope apps and flows for team productivity. Which connectors are allowed depends on the use-case (if you are thinking about an environment request process, this can be well combined with the question of required connectors).
- “Business Critical” - a very restrictive policy that ensures that nothing works except what’s needed for the business critical process in that environment.
Depending on your environment strategy you might consider:
- “Administration” - a special DLP for your administration environment. There are great possibilities to make the administrators life a lot easier with a bunch of great connectors.
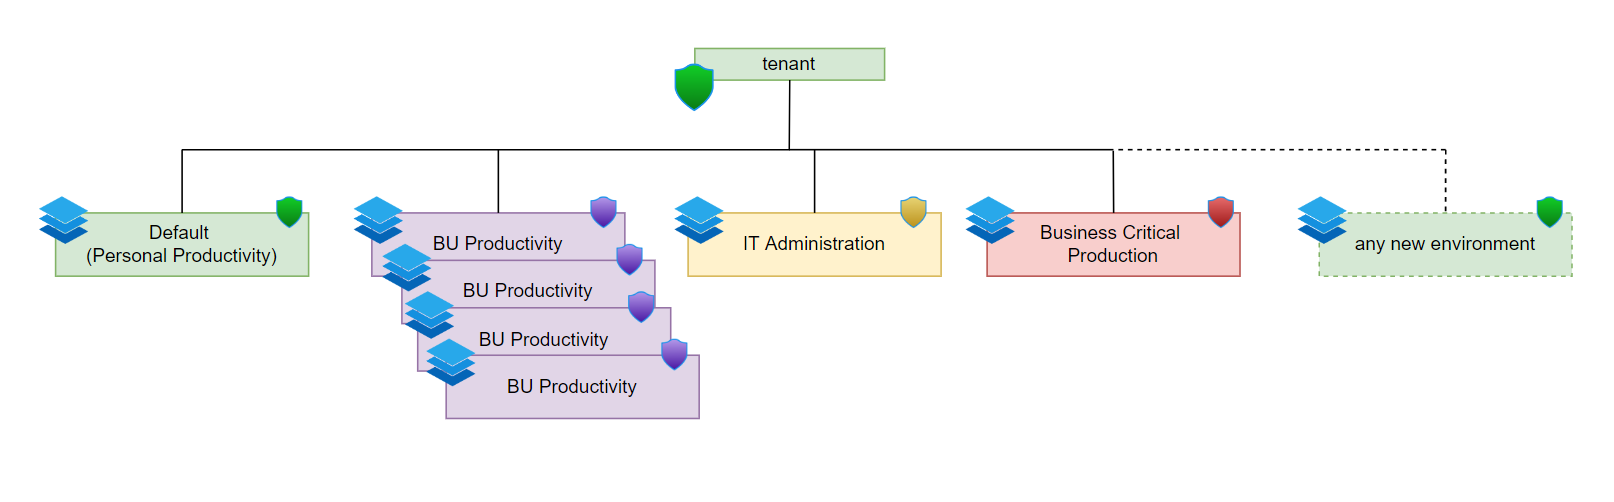
Important! There are constantly new connectors added, so we make sure to set the default group for new connectors to Blocked. This way every new connector automatically gets sorted into the blocked category and our DLP stays always up to date.
In the Power Platform Admin Center, we select Data policies, in the Pre-build connectors menu we select the cog wheel in the upper right corner. We select Blocked and then Apply.

We need to go deeper
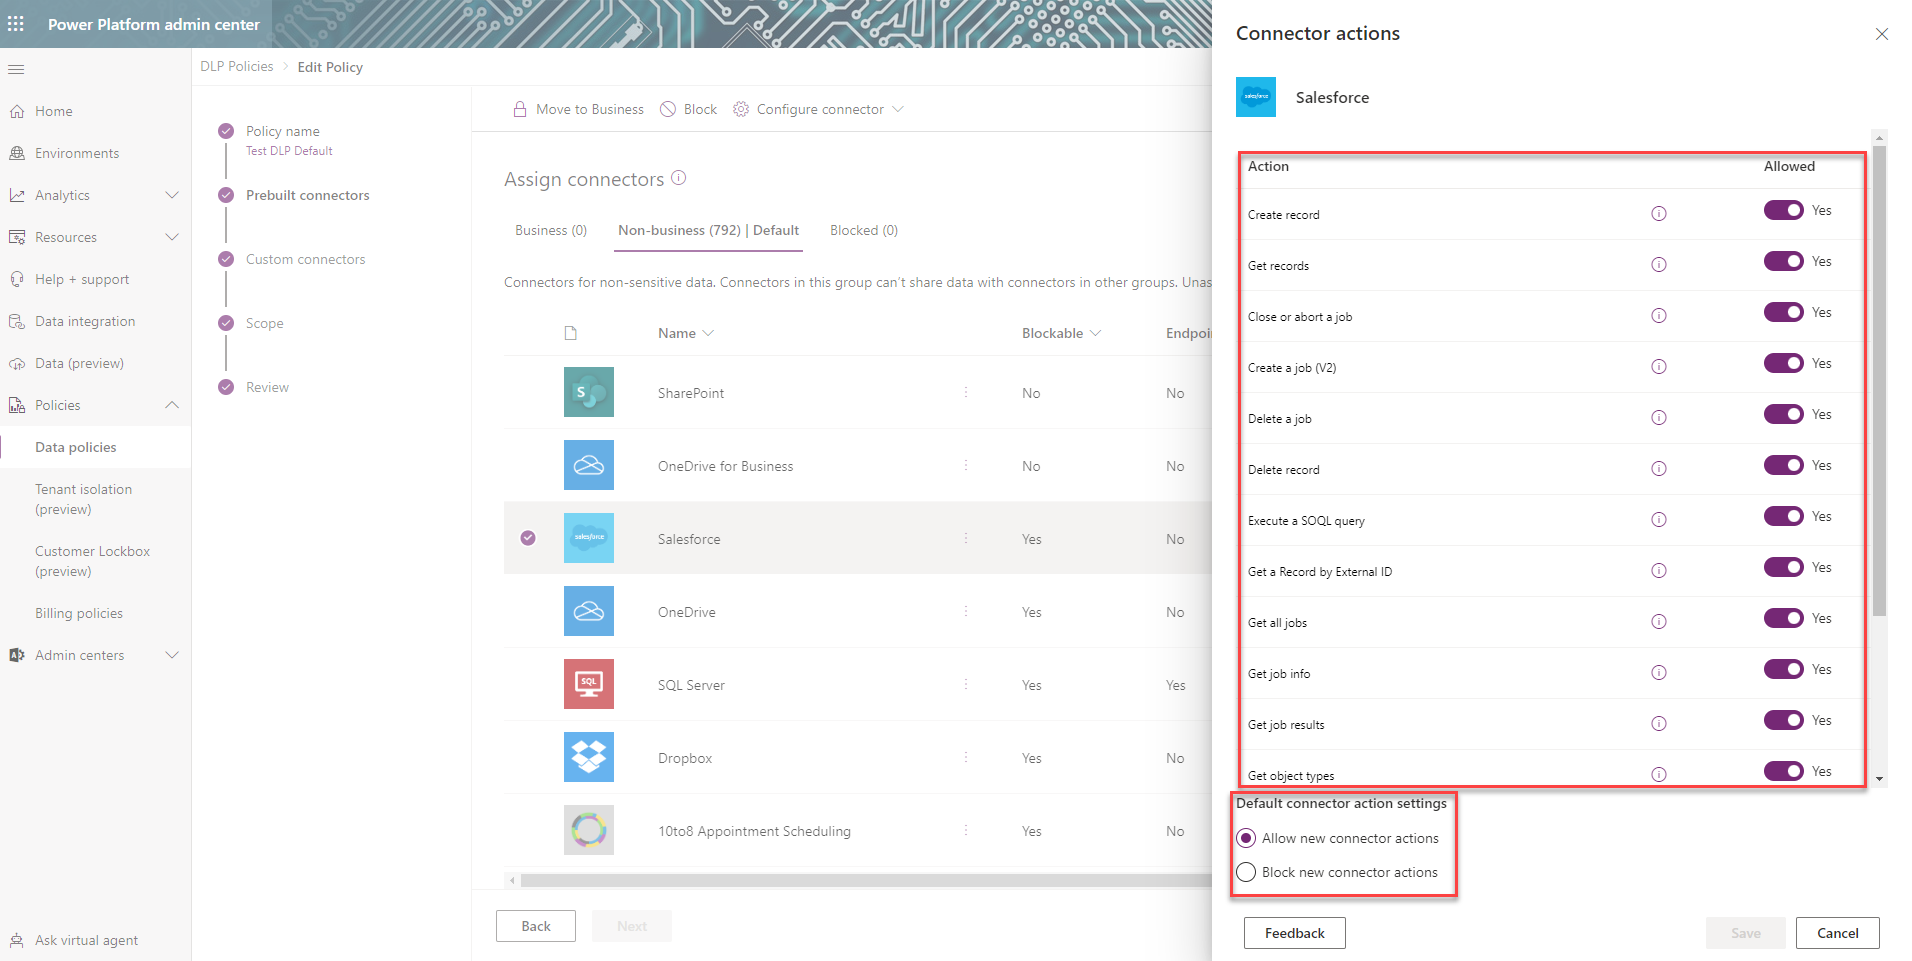
We have the ability to even further customize how connectors are handled in our environments. We can not only block the whole connector, but actually configure the single actions of a connector.
In the Power (Platform admin center)[aks.ms/ppac] we select Policies and the Data policies. Select a policies and select Edit policy in the menu bar at the top. Select Prebuilt connectors. Now we can select a connector, select the ellipsis, select Configure connector and then Connector actions.
The following menu lists all actions of this connector and we can choose if we allow the single actions or not. At the bottom of the menu we can even choose the default connector action settings. What happens to new actions that are added to a connector. Should they be blocked or allowed?
This is a great functionality to customize our DLP in detail for very specific use cases.
Why you should never layer your DLPs
It’s technically possible to combine multiple DLPs in one environment, but it’s hardly a good idea:
Use as little DLPs as possible per environment.
Thinking about the blocked connectors while layering DLPs isn’t the issue. If one connector is blocked in one DLP, it doesn’t work in any other DLP. The most restrictive DLP wins. But the combination of connectors in the Business and Non-Business category gets messy very quickly. If you classify one connector as Business in one DLP and as Non-business in another, the combination with other connectors is what determines wether it works, or not.
Do yourself a favor and don’t try to combine the effect of multiple DLPs.
Think, before you implement
One last thing that is important. When we implement a new DLP policy, it might affect existing flows and apps. As of now, there is only one way to find out which flows and apps are affected by a new DLP and that is the DLP Editor V2 in the Center of Excellence Starter Kit. When you create a new DLP with that app it will show you an Impact Analysis that lists all flows and apps that are affected by this new DLP. I highly recommend using it.