
Set up security groups for your environments
Security groups
Security groups are a great way to control which users have access to which of your environments. If you have multiple environments and not every user is allowed to have access to any, security groups will help us achieve this goal.
Security groups come from Azure Active Directory (Azure AD) and are used to group different resources in Azure such as users, licenses or roles. This way you can group different users and grant access based on the those groups.
Why should we care?
In Dataverse (and therefore in every environment with a database) there is the standard security principle in place, which is role based. If users are added to a database, the access to resources within that environment (data, apps, flows, etc.) is based on the role concept. Only users with the correct security role can access resources in this environment.
But after creating a new environment, every user with an active Power Platform license will be added to an environment automatically. Quite often that is not what we want, even if there is a role based security concept in place. If we set up a new environment for all the sales user, we just want user working in the sales department to be added to that environment and security groups can help us with that. They are used to group resources, so we can use them to group users and roles.
These security groups work as a pre-filter to prevent every user to get added to an environment automatically. When a security group is associated with an environment, only user that are part of this security group get added to the environment.
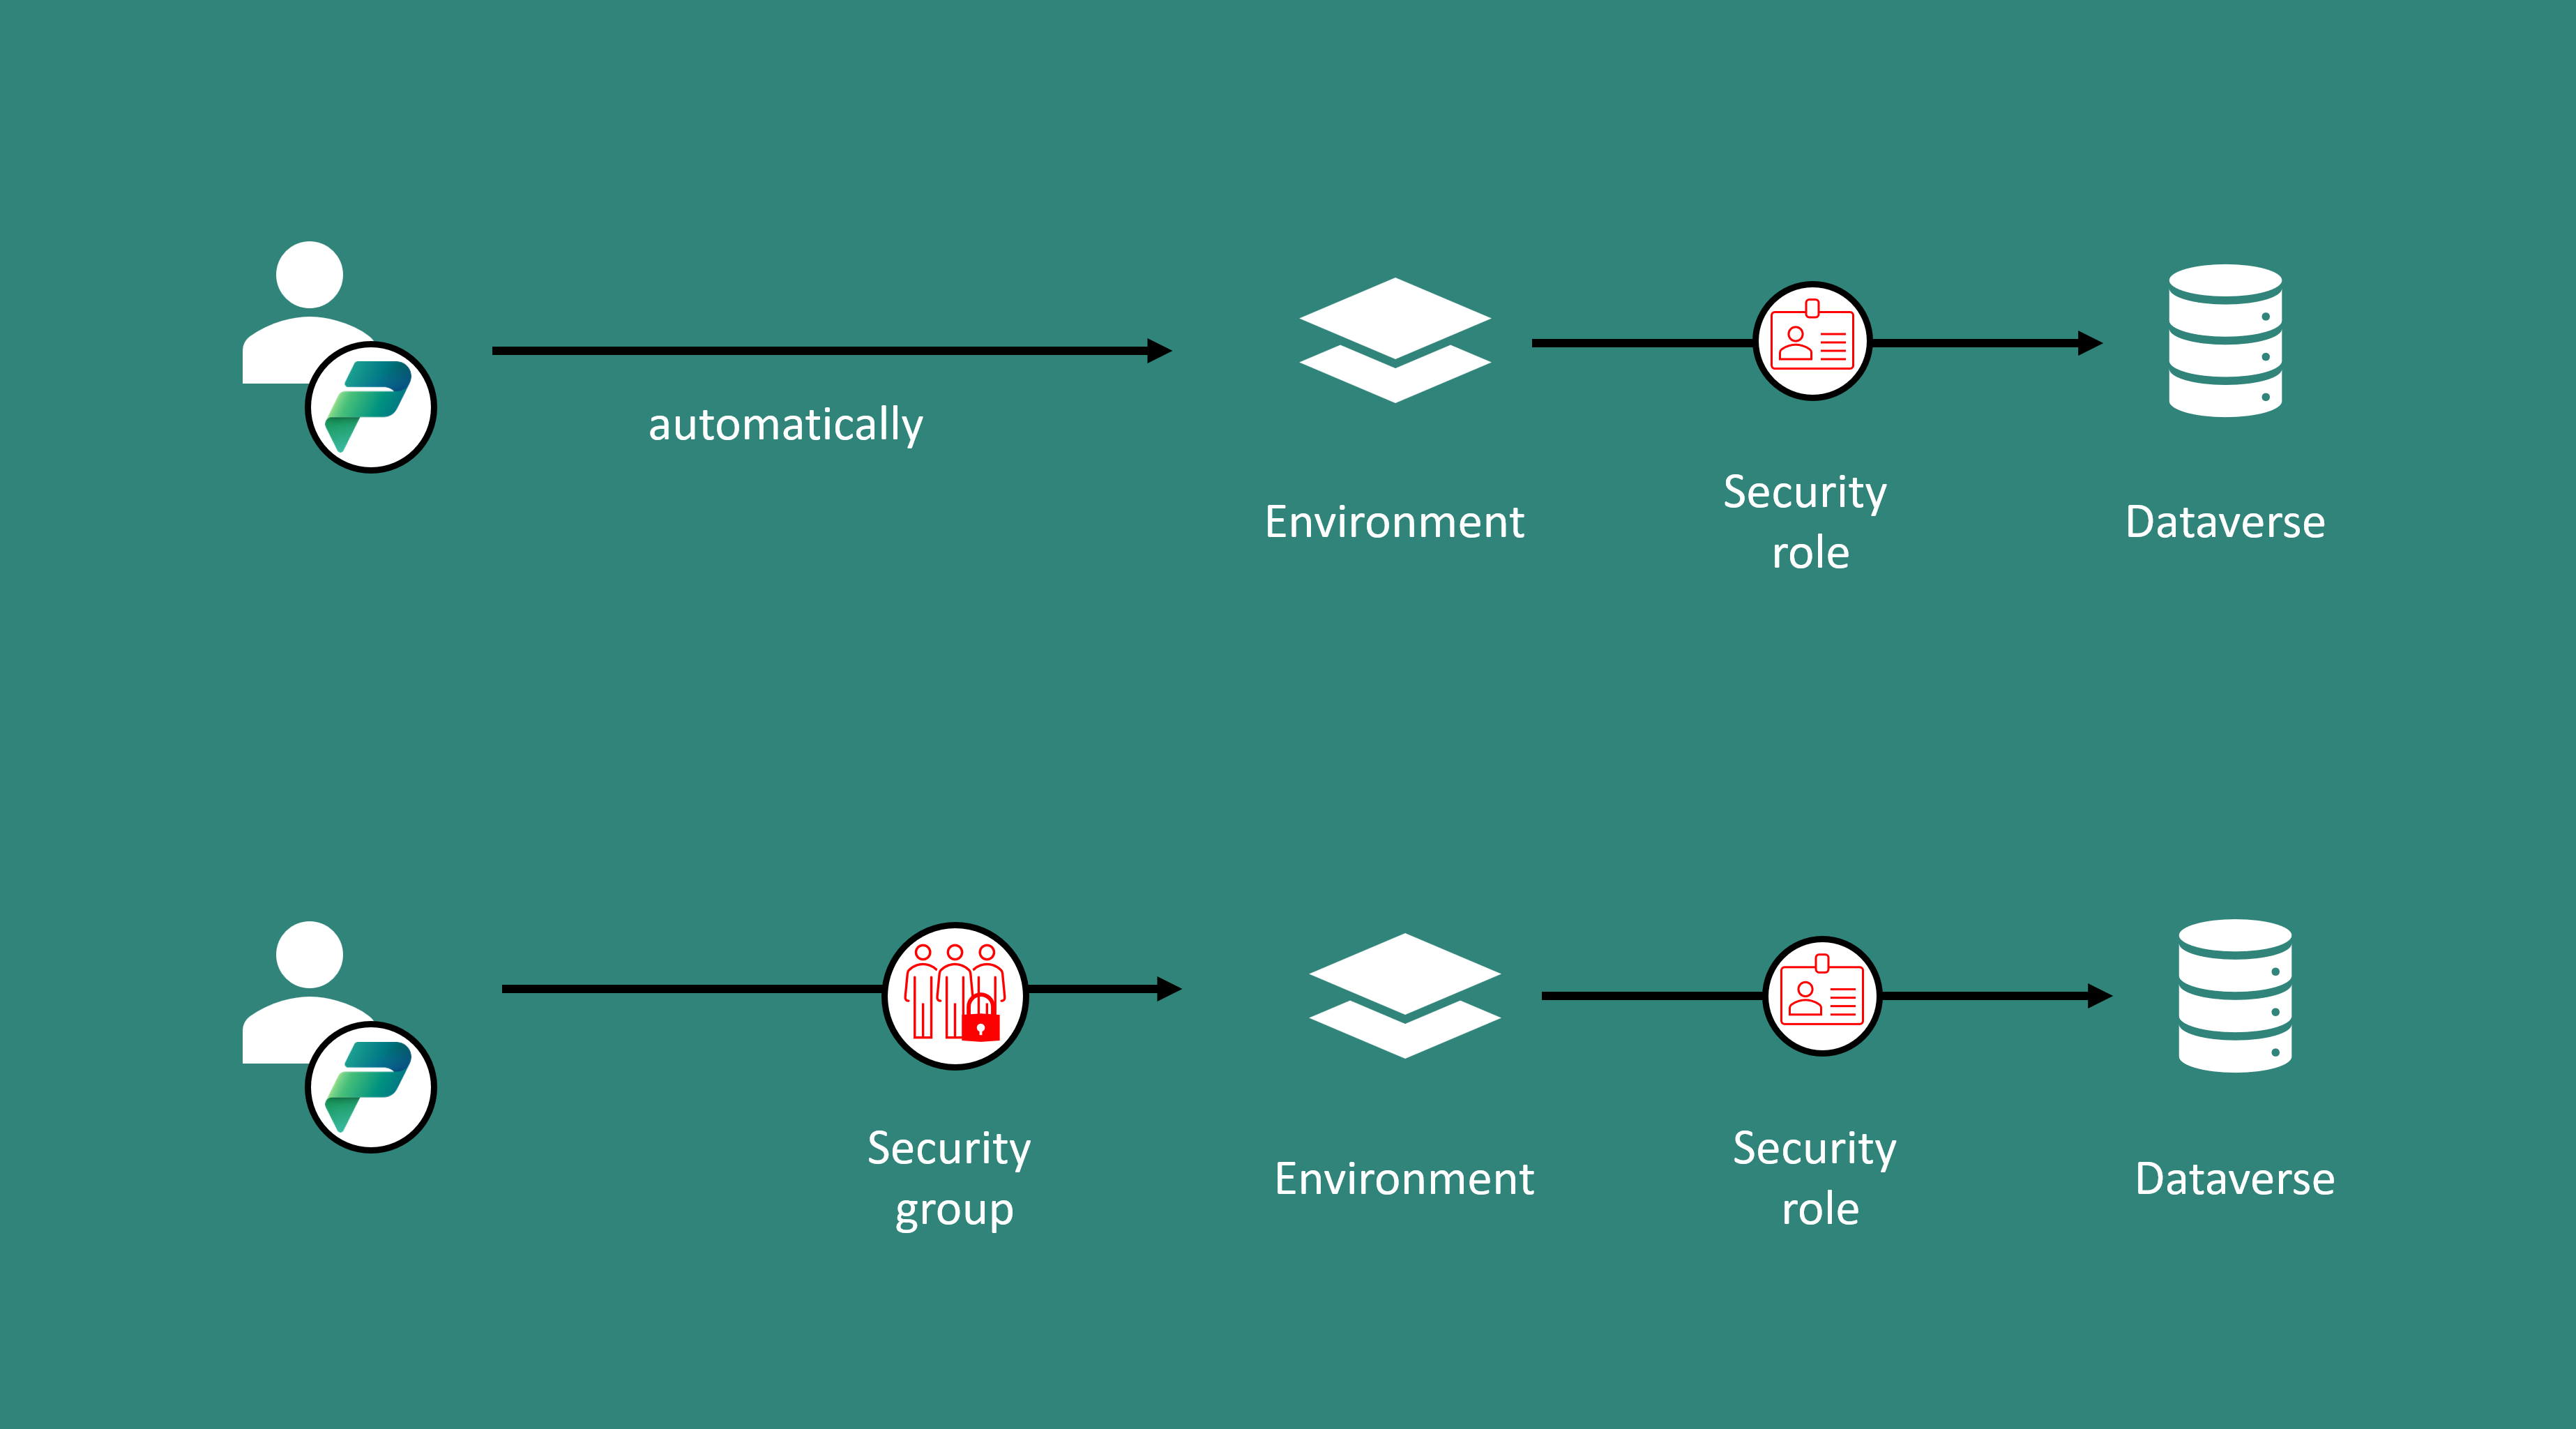
Security group –> prevent users from being added to an environment automatically Security roles –> prevent users from accessing resources within an environment
And there are even more benefits from using security groups:
- more precise handling of security: You can create different groups for different user groups. That makes adding and removing users to or from an environment easier, quicker and reduces the probability of errors.
- nested security groups: you have the possibility to work with nested security groups, which have different security roles.
- easier management: you can bulk assign groups to environments and have control over permissions.
- possibility of automation: We can add Dataverse security roles to groups, to let us automate the whole security management for users in environments.
How to set up a security group
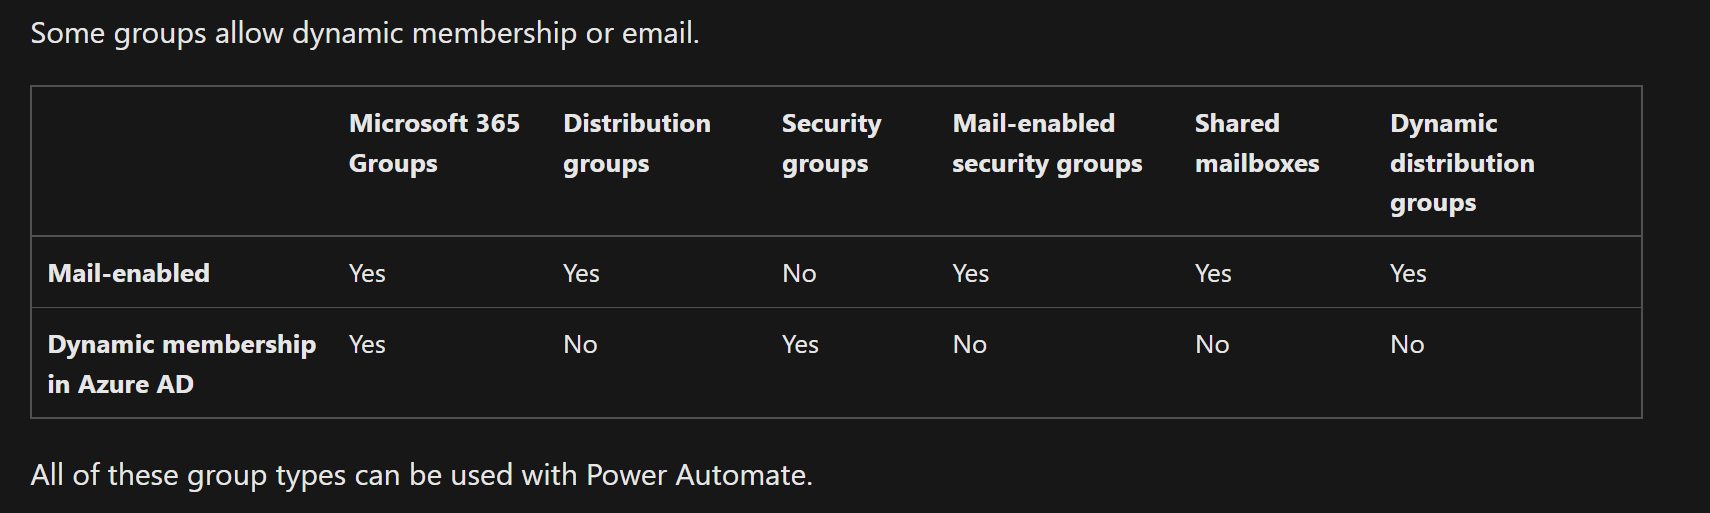
Before I demonstrate two ways of setting up security groups, let’s clarify what I mean, when I talk about security groups for Power Platform. In fact there are a lot od different groups in the Microsoft universe and it’s not always to distinguish between them. The two most common used groups are Microsoft 365 Groups and Azure AD Security Groups.
Microsoft 365 Groups define membership, access and permission to different resources and services within Microsoft 365. They consists of members and owners and they’re can be created from different applications in Microsoft 365 or the admin center.
Azure AD Security Groups have the same functionality but in Azure and are often used to manage user licenses. They can have users, deices, groups or service principals as its members and they’re created from the Azure portal or the Mircosoft 365 admin center.
Both kind of groups work for defining access, membership and permissions in Power Platform environments. One difference to keep in mind is, that Microsoft 365 Groups are Mail-enabled which can become handy, if you want to easily address all member of a certain group. Also the membership of Microsoft 365 groups can be managed dynamically in Azure AD, no other group combines these two features.
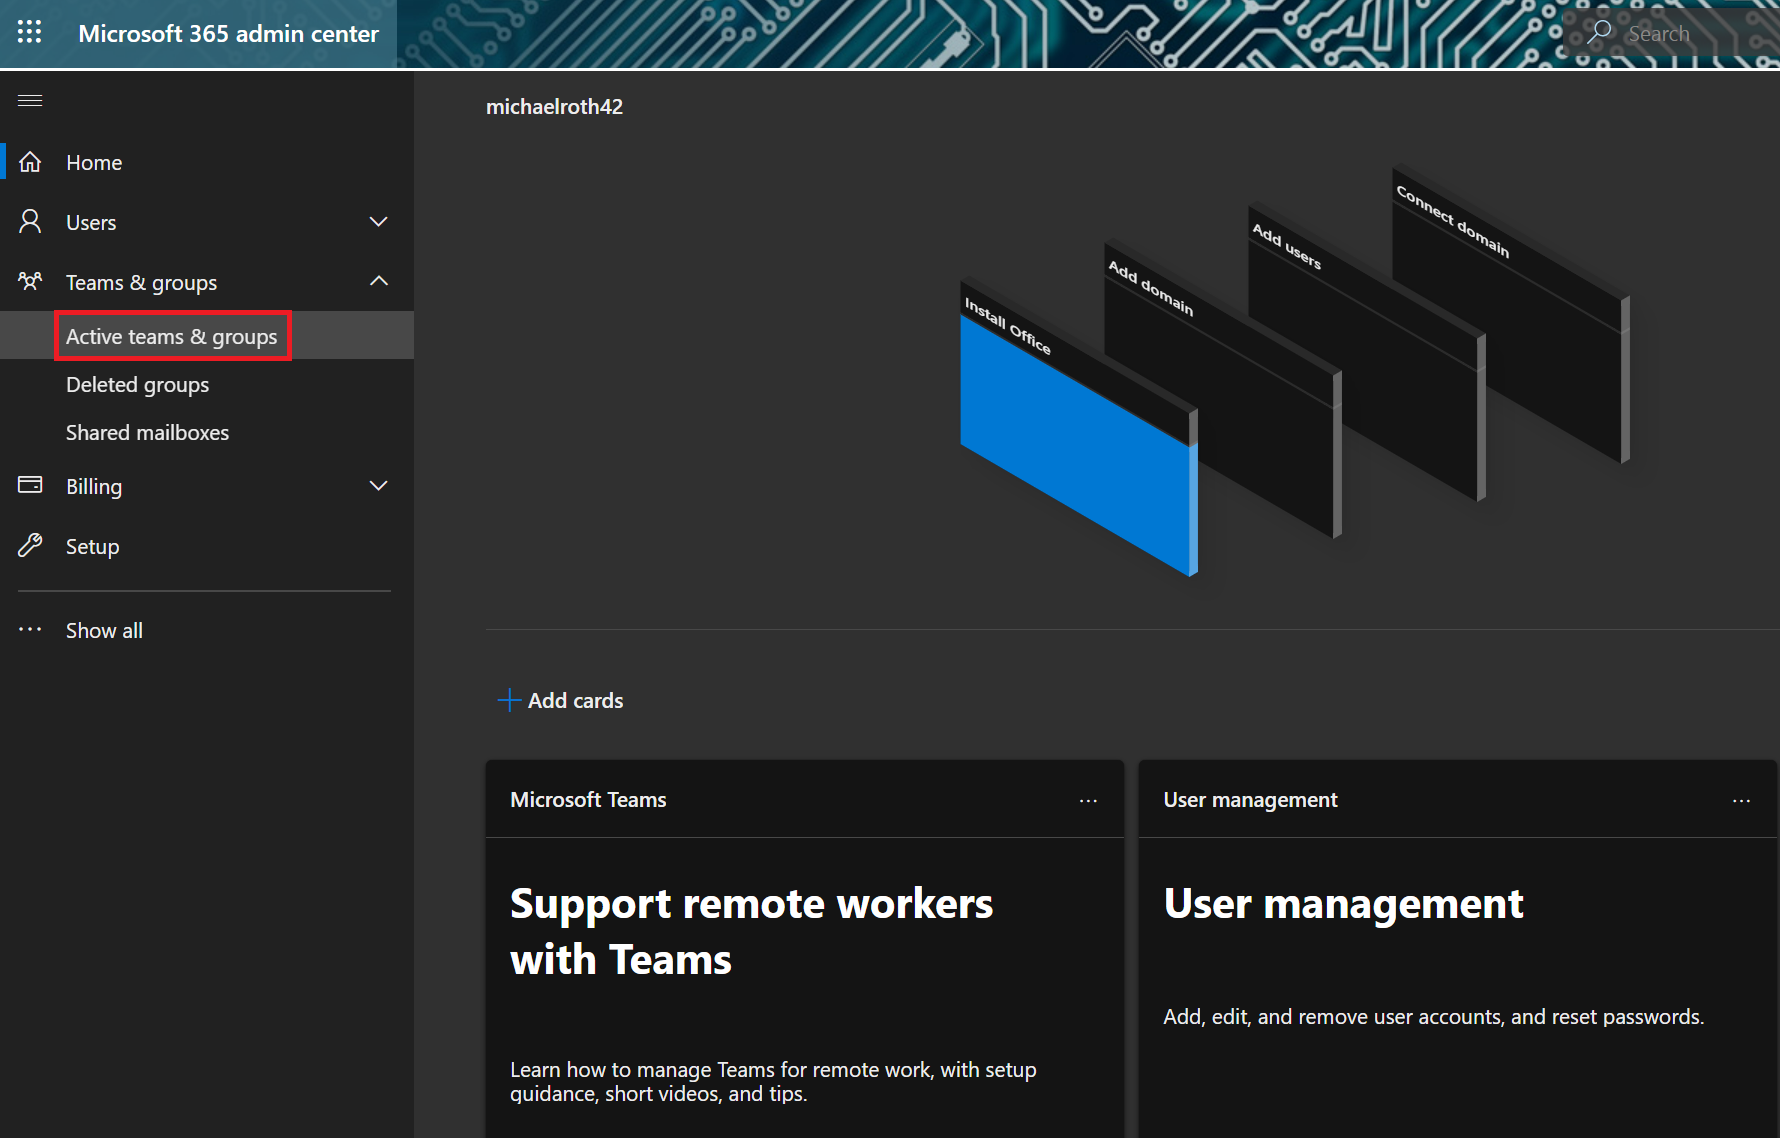
Create a group from the Microsoft 365 admin center
Navigate to the Microsoft 365 admin center and select Active teams & groups
There you have tabs listing the different groups: Microsoft 365, Distribution list, Mail-enabeld security and Security.
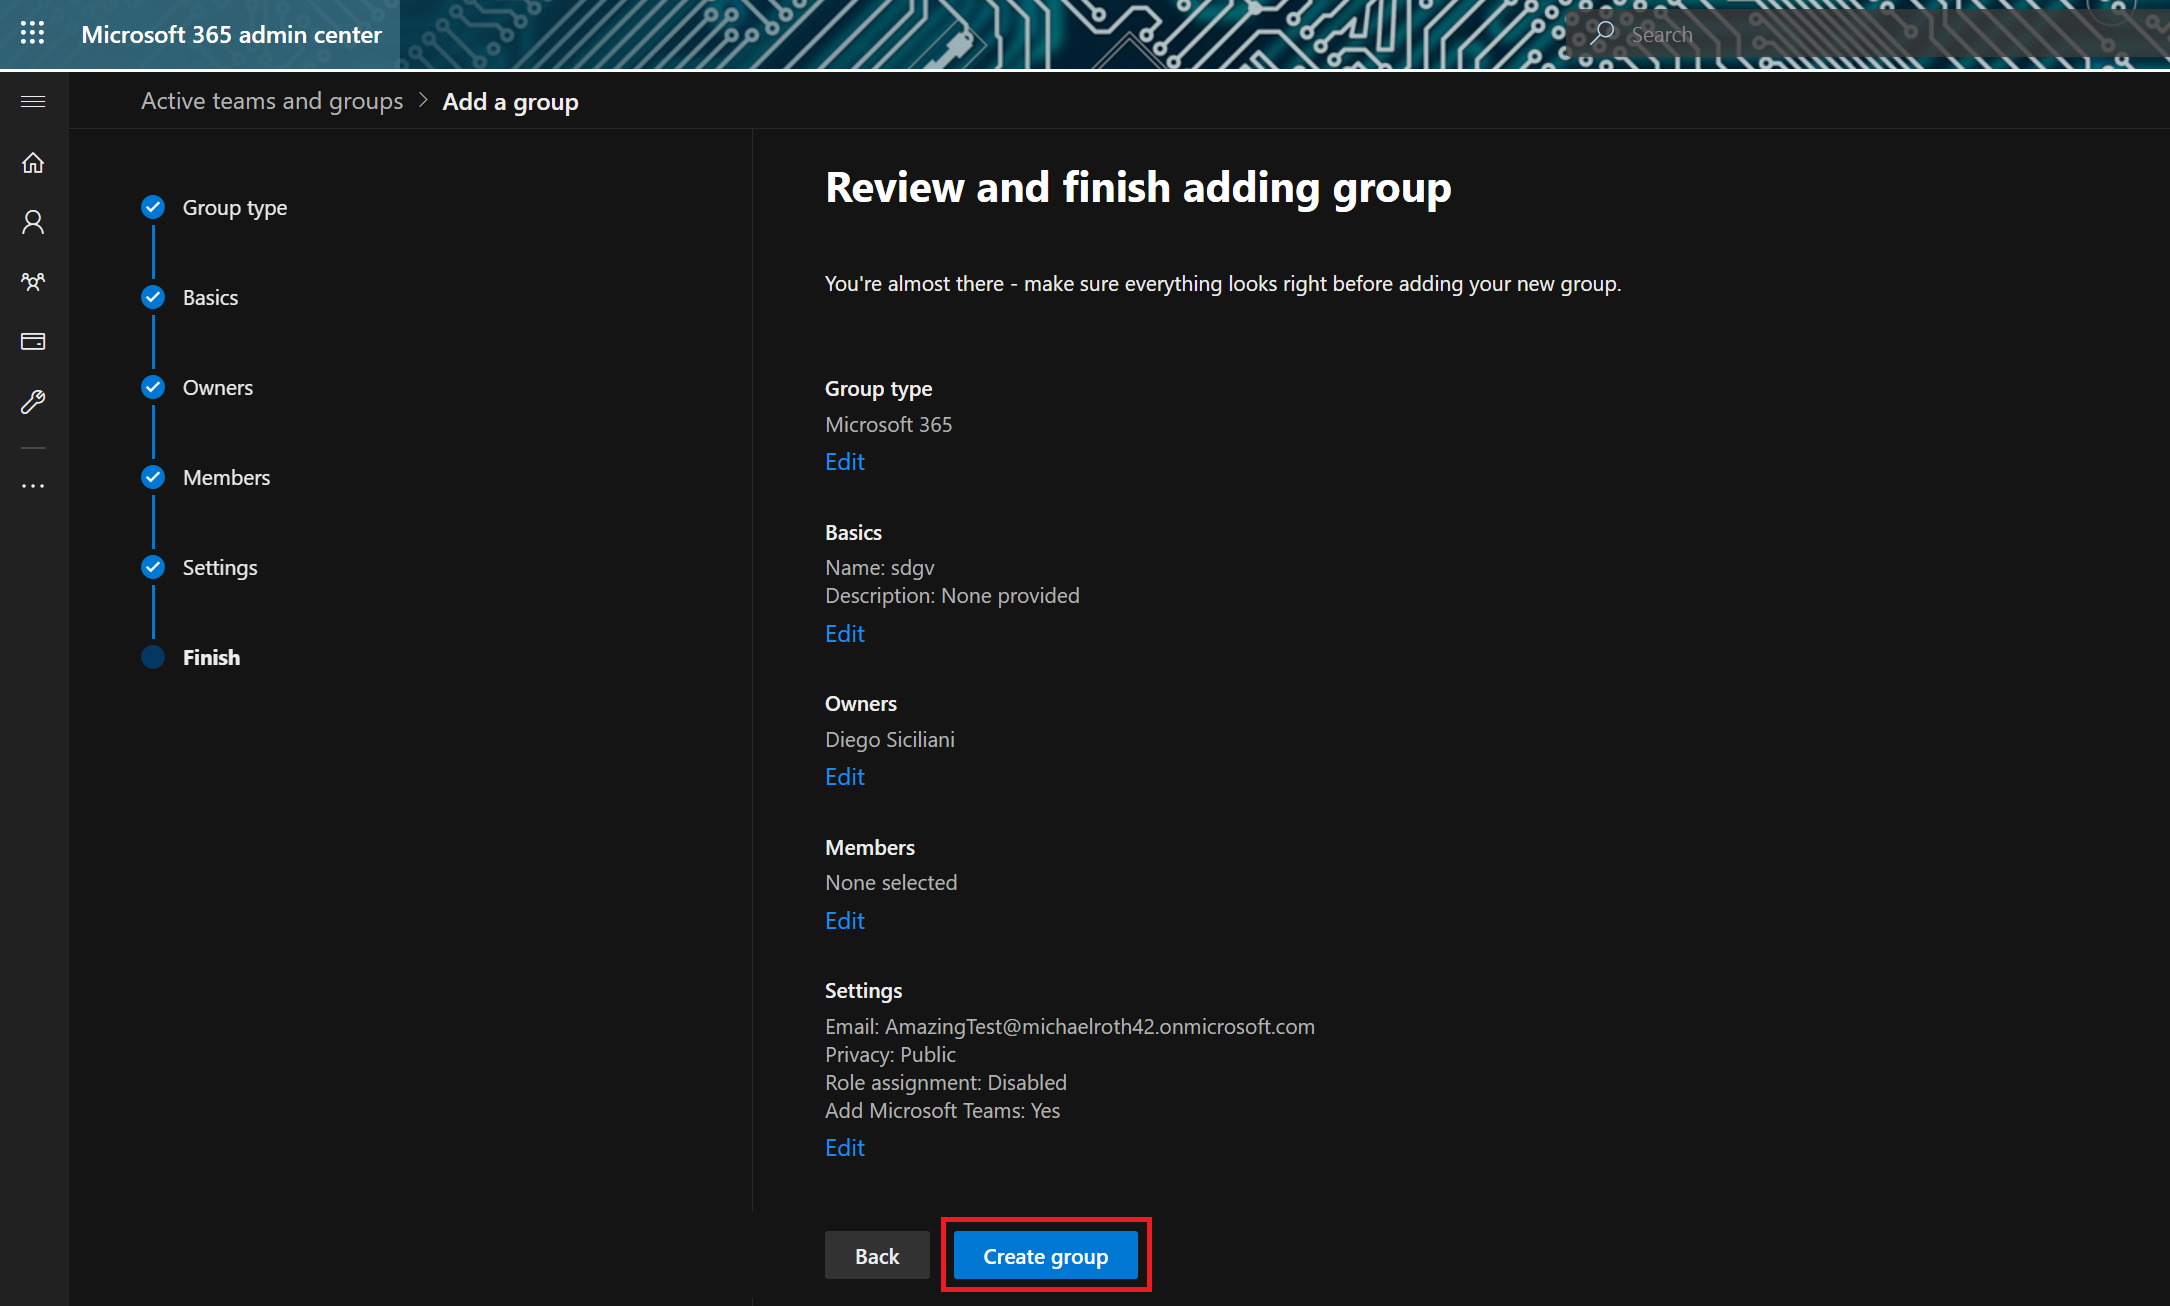
Select Add a group and fill out the following information:
Group type: select Microsoft 365 or Security If you decide for Microsoft 365 you have to provide the following information. Basics: Provide a name and a description Owners: Add one ore more owner who might have additional permissions later on Members: Add members to the group Settings: Add a group email address, decide if you want to make this group public or private (if you want to use it for Power Platform access management, make it private) and decide if you want role assignments to be enabled for this group (attention, this means Azure admin roles, not Dataverse security roles!)
You have to assign at least one owner.
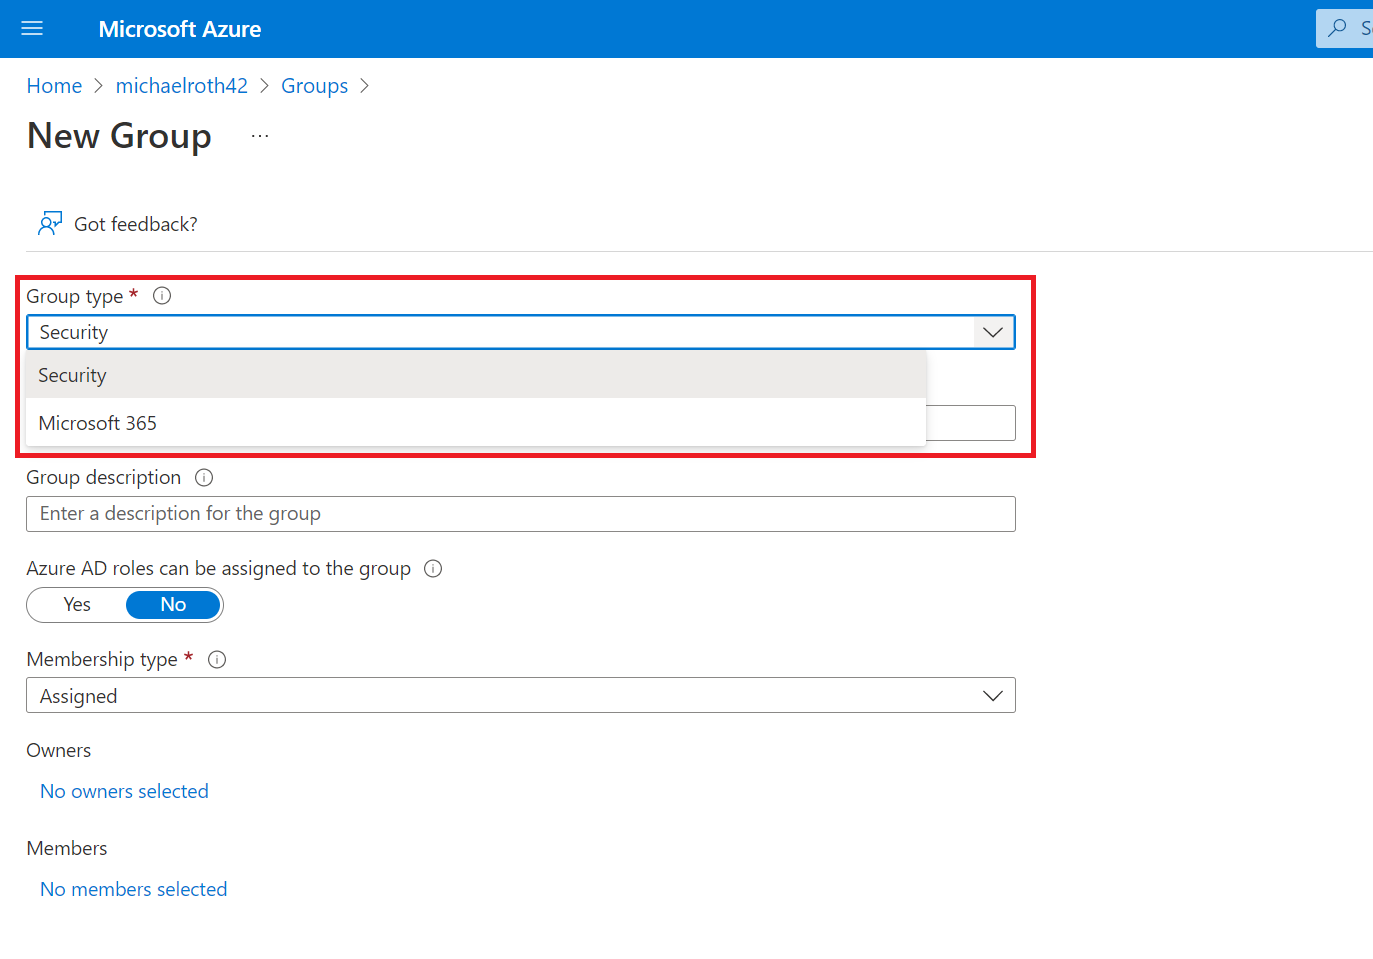
If you decide to create a security group, you just have to provide the following information: Name: Description:
You can add owner and member in a later step, but don’t have to while creating.
At the last stage you get an overview over your setting, finish the group creation with selecting Create group
Create a group from the Azure portal
The process from within the Azure portal is exactly the same, yet it looks a bit different.
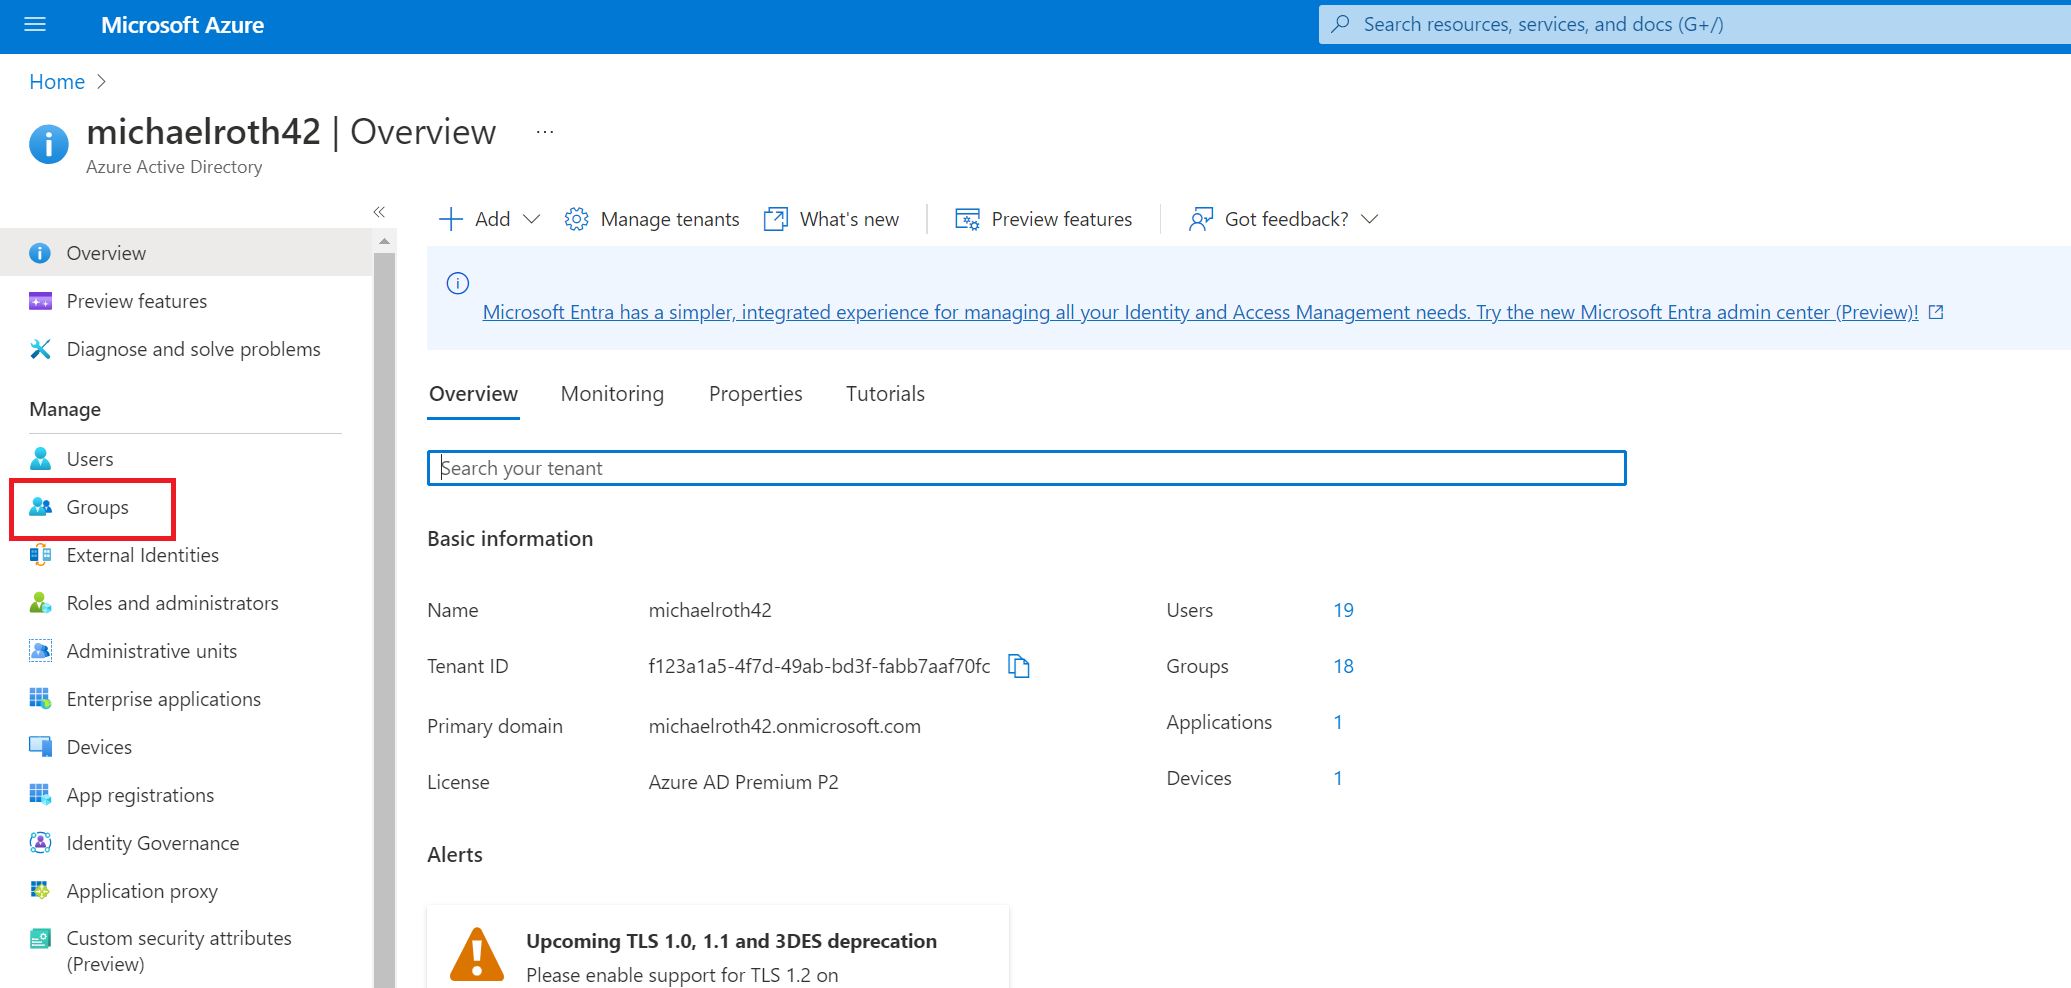
Navigate to the Azure portal and select Azure Active Directory
Select groups to get to the groups menu
Select New group to start the group creating process
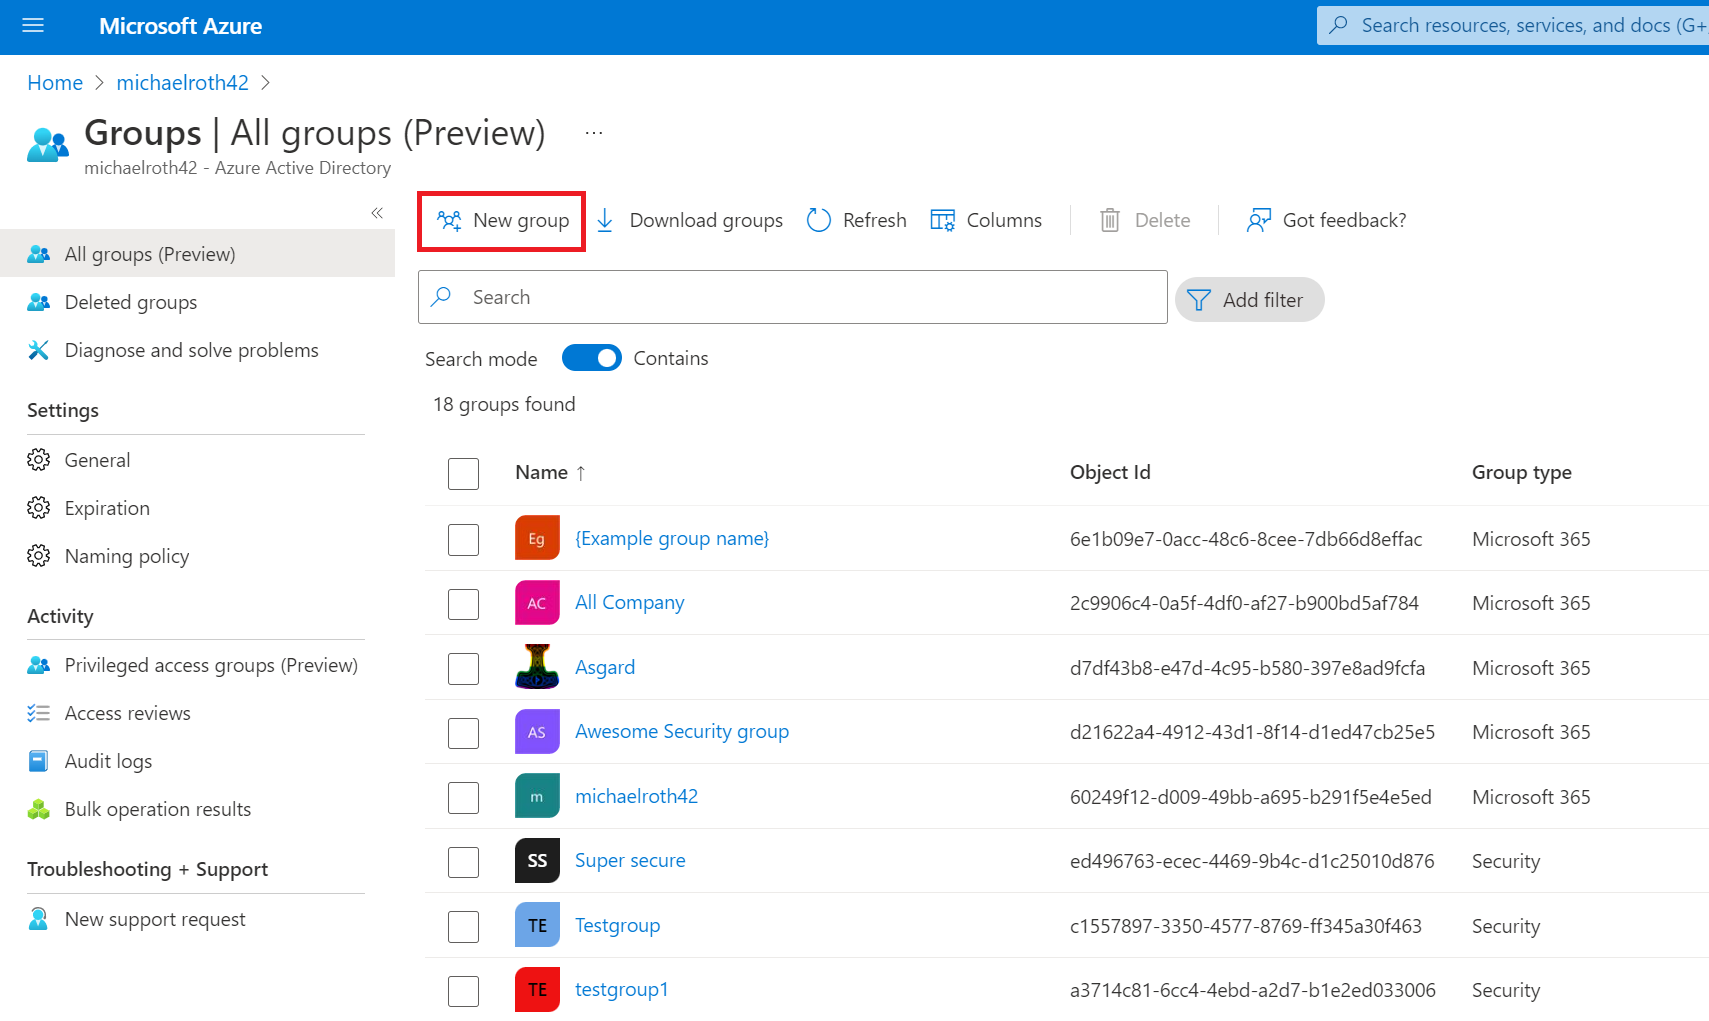
From here you can create two kind of groups: Security groups and Microsoft 365 groups and the information you have to provide are exactly the same as in the Microsoft 365 admin center.
How to add a security group to an environment
Once you have a Microsoft 365 or security group created we can navigate to the Power Platform Admin Center and select environments.
When we want to create a new environment with a security group, we select New, provide all required information and select Next. At the very bottom we find the paragraph Security group. Select the plus icon to see a list of all Microsoft 365 and Security groups that are available in our tenant. Select the group you want to use and select Done.
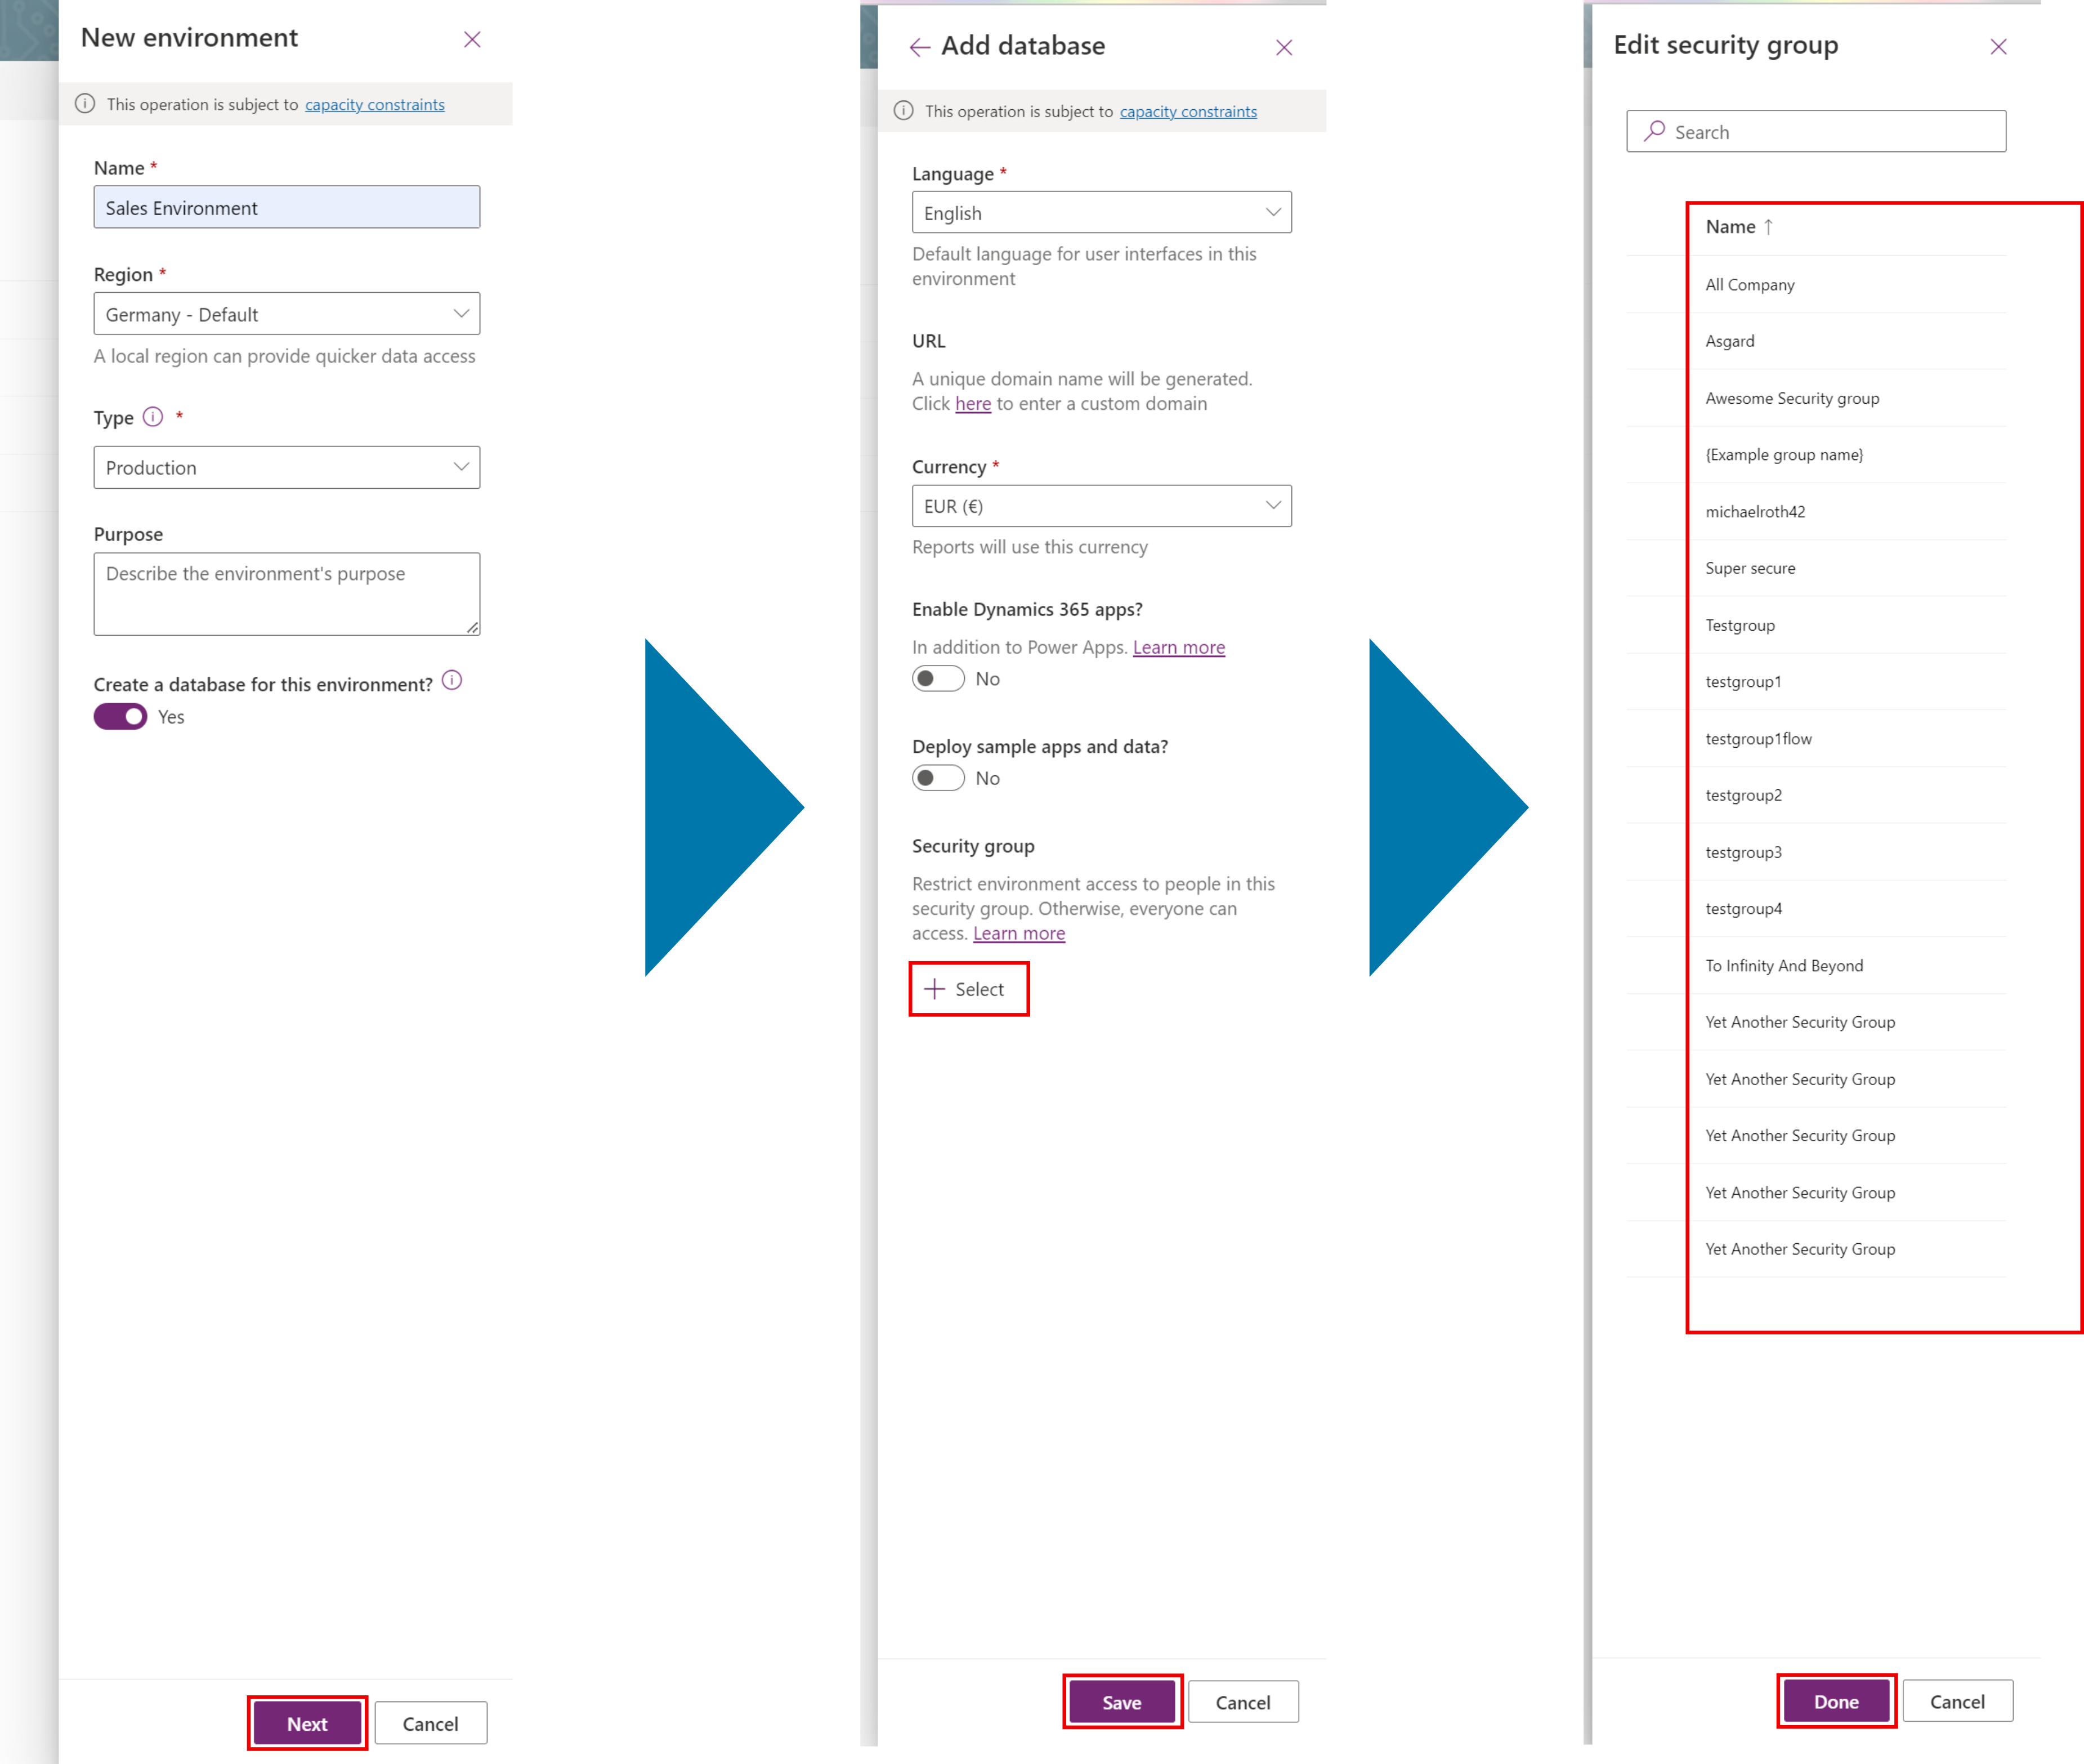
When you want to add a security group to an already existing environment, select the environment from the menu and select Edit in the Details pane. In the side menu you see the Security group section at the bottom of the page. Select the pen icon to see a list with all Microsoft 365 and Security groups available in our tenant. Confirm your selection with Done

Bonus: How to link a security role to a security group
If you want to add a security role to the security group, to give every member of the security group the correct role to access resources in the environment, there is an additional step necessary. We need to create a team, to which we can associate the security group, as well as a security role.
Navigate to the teams settings menu in the environment from which you want to assign a security role to the security group. Select the environment and in the Access pane under Teams select See all
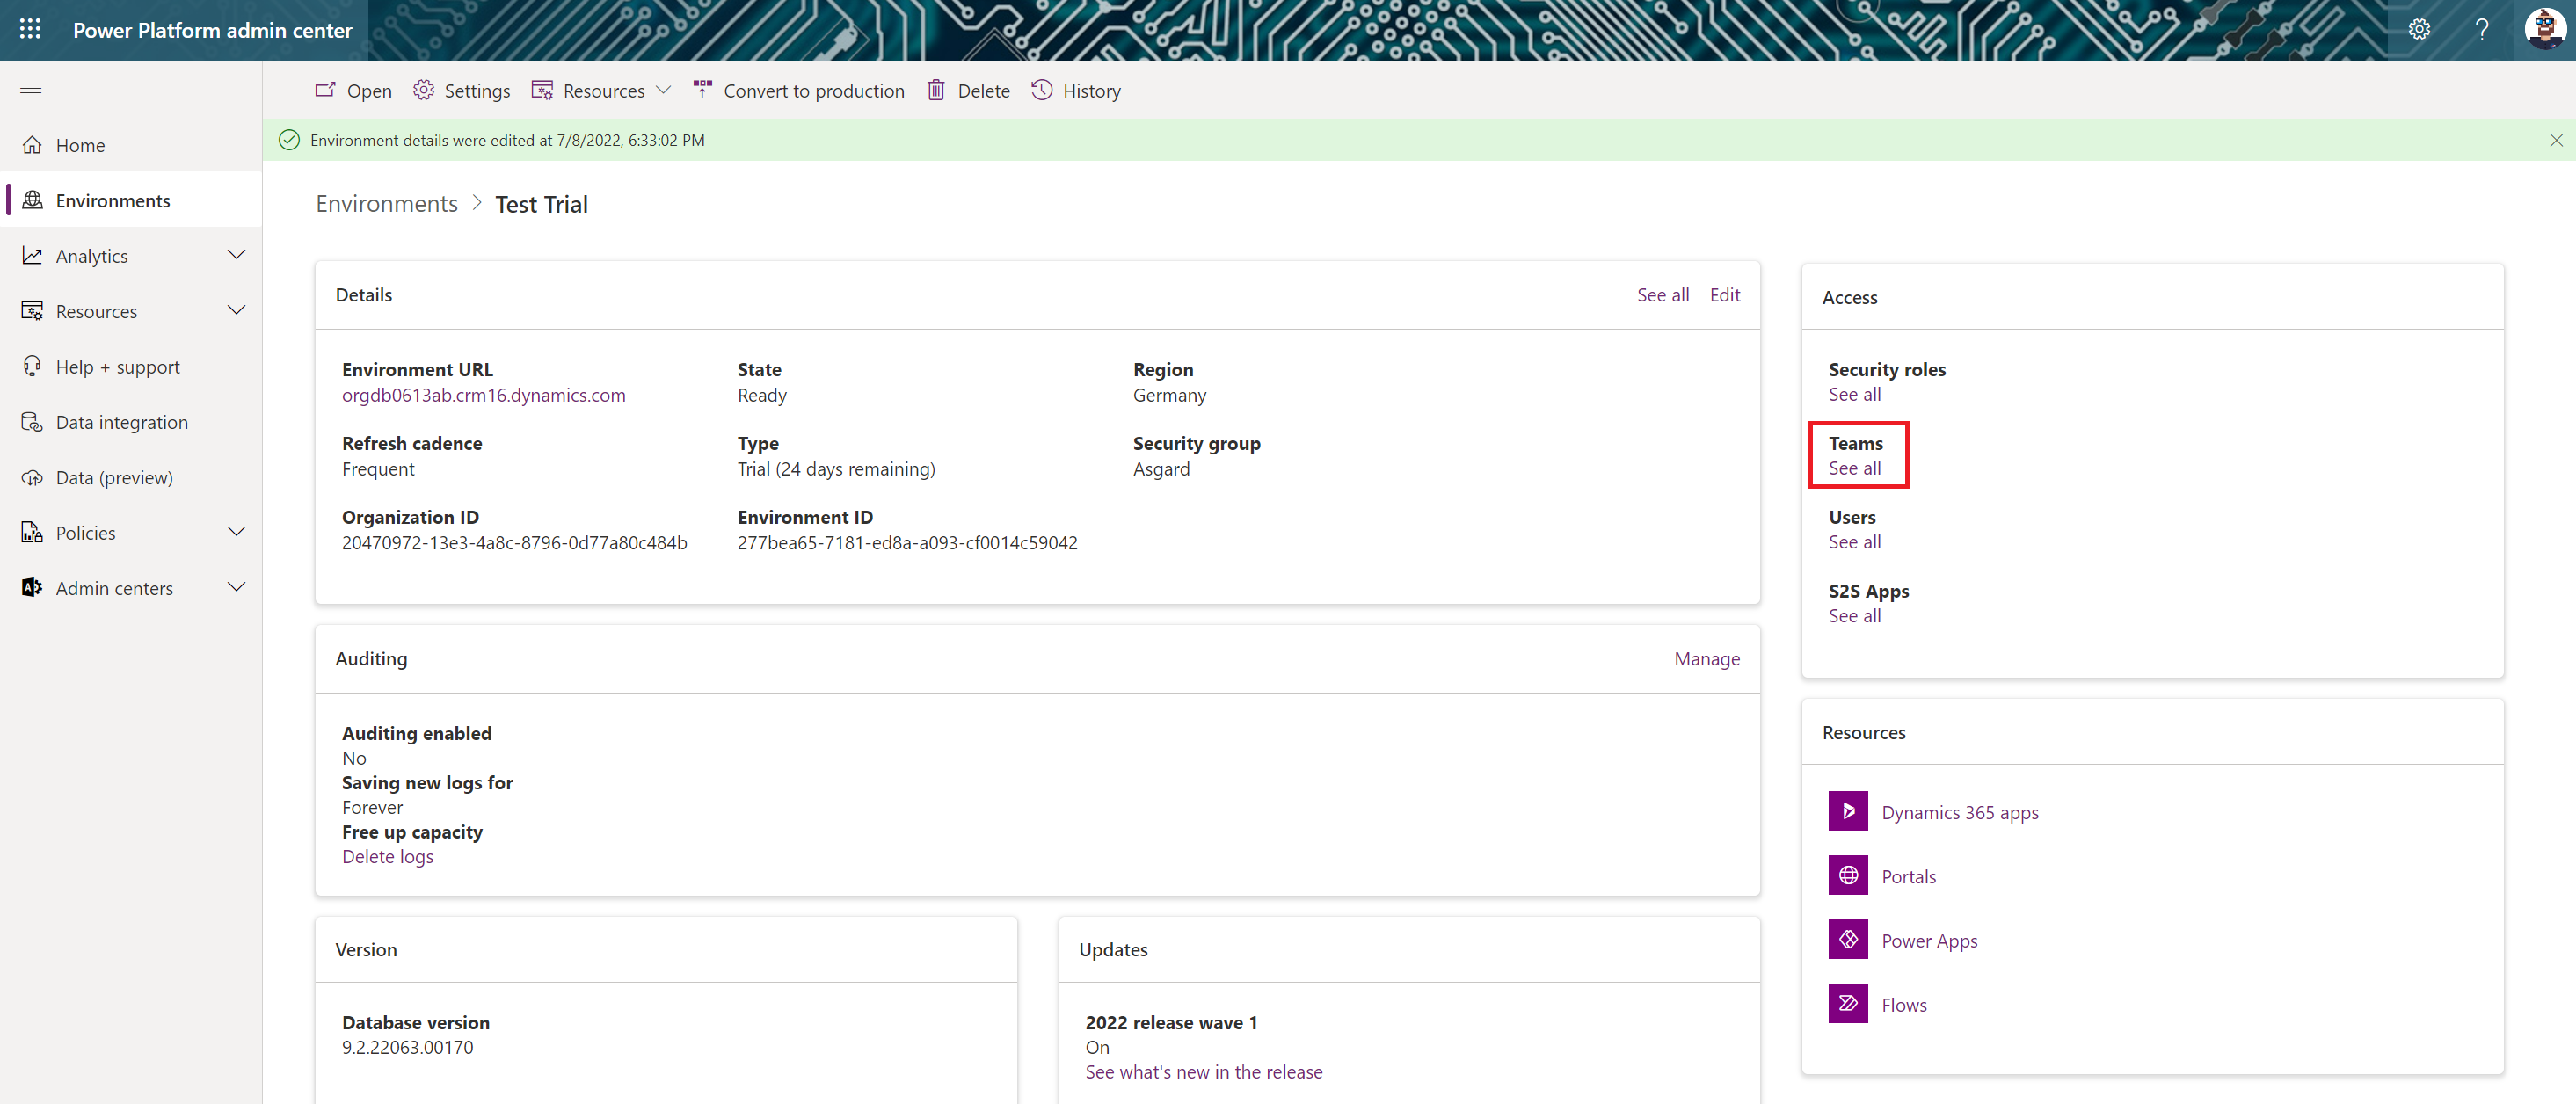
(You will see an already existing team, which usually has the name of your business unit. Business units are another layer of managing security in Dataverse. You can create different business units to further customize your security.)
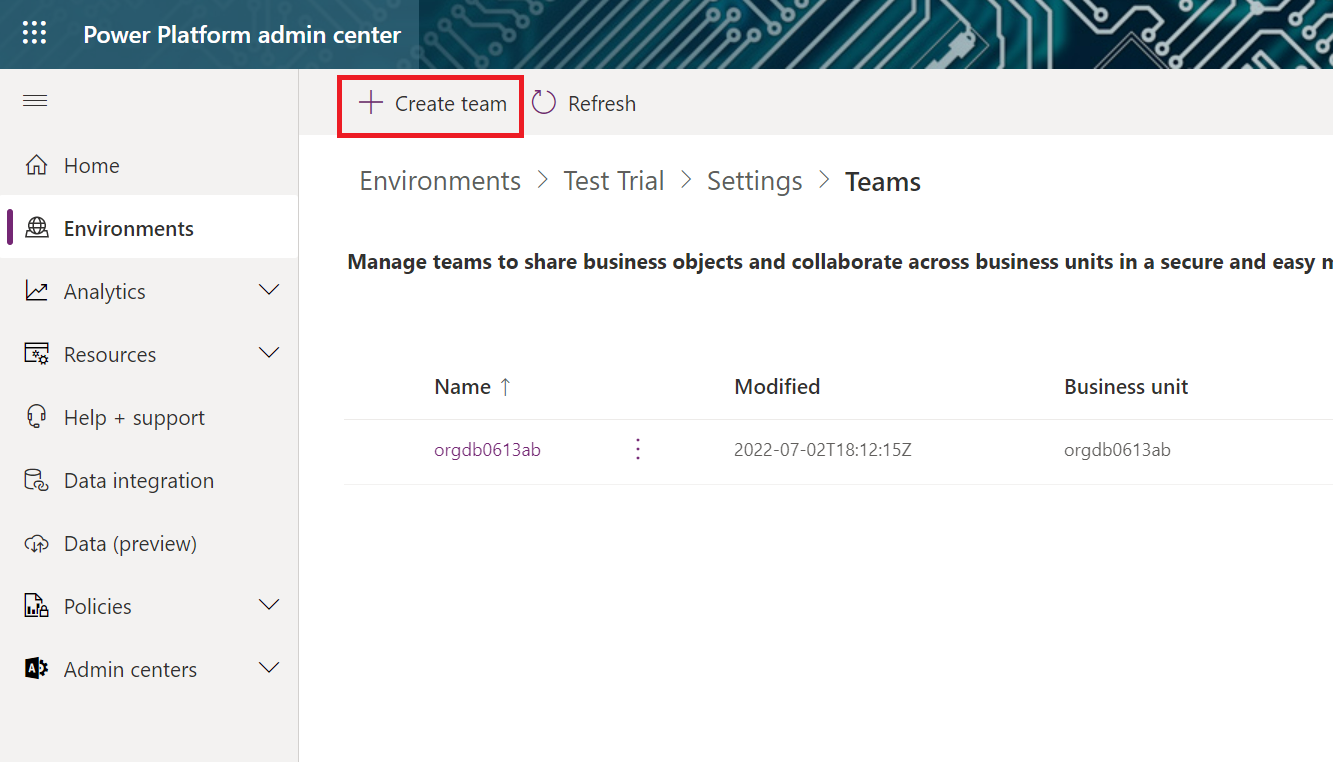
Select Create team in the upper left corner
Provide the following information:
Team name: you can choose the name, often it makes sense to take the same name as the security group Description: add a description that helps you identify the purpose of the team Business Unit: select a business unit Administrator: provide the environments administrator, or pick the one that created the team Team type: here we pick the kind of team that matches the security group we just created I created a Microsoft 365 group, so I pick AAD Office Group
Then you search for the name of your group. Finally you have to select the Membership type. You can decide which are the active users for this team, based on the different roles within the security group.
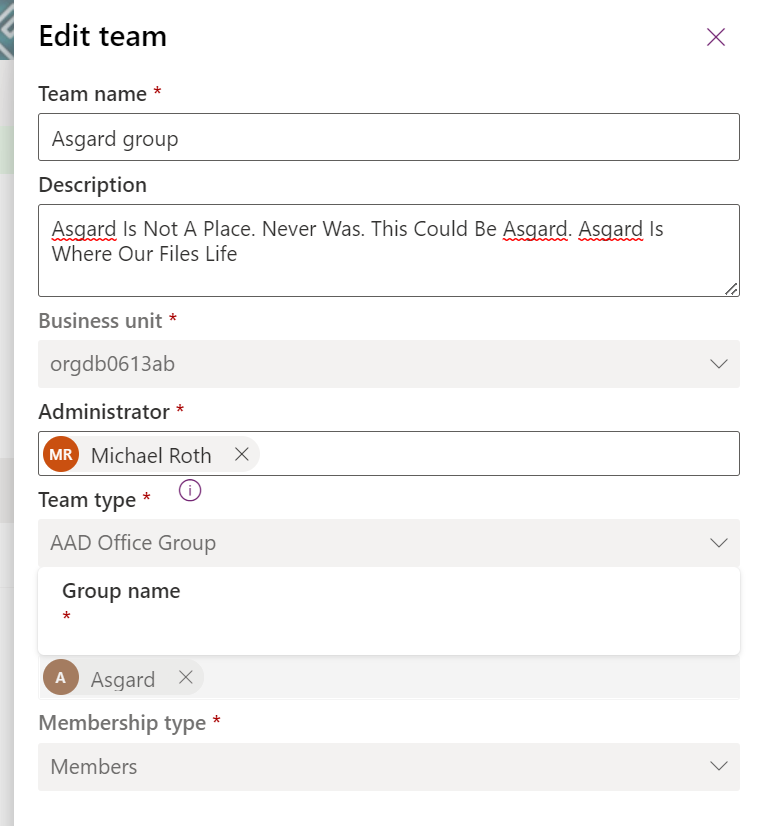
Hint: When you already provided a description for your group it will be added automatically, after you created the team.
Select Next to get to the security roles menu. Here you can assign a security role to the team.
Now every member of the security group will automatically be associated with the team we just created and gets the security role.
I welcome comments, remarks and discussions about your experiences with Power Platform Governance.
Find me on Twitter and LinkedIn
Useful resources
Groups in Microsoft 365 and Azure, and Which is Right for You
Control user access to environments: security groups and licenses