Order from Chaos Pt.2
Office 365 for free? — Get your ticket to ride for nonprofits
In the last article I described how Office 365 is the best solution for nonprofit organizations to step up their organizational day-to-day business.
Before you can start implementing cool solutions you have to think about the right licenses you need. On first glimpse that can be a little bit confusing, but I’ve tried a lot of things and want to share my knowledge with you.
1. Check if your organization qualifies
First things first. Is your organization a nonprofit organization in the way Microsoft defines it? Before you can benefit from their non-profit offers, you have to validate that. It’s made pretty easy, you just have to give your tax identification number or a registered documentation from government entities. Microsoft will then validate your organizational status and writes you an e-mail once they’re done.
2. Get access to the nonprofit portal
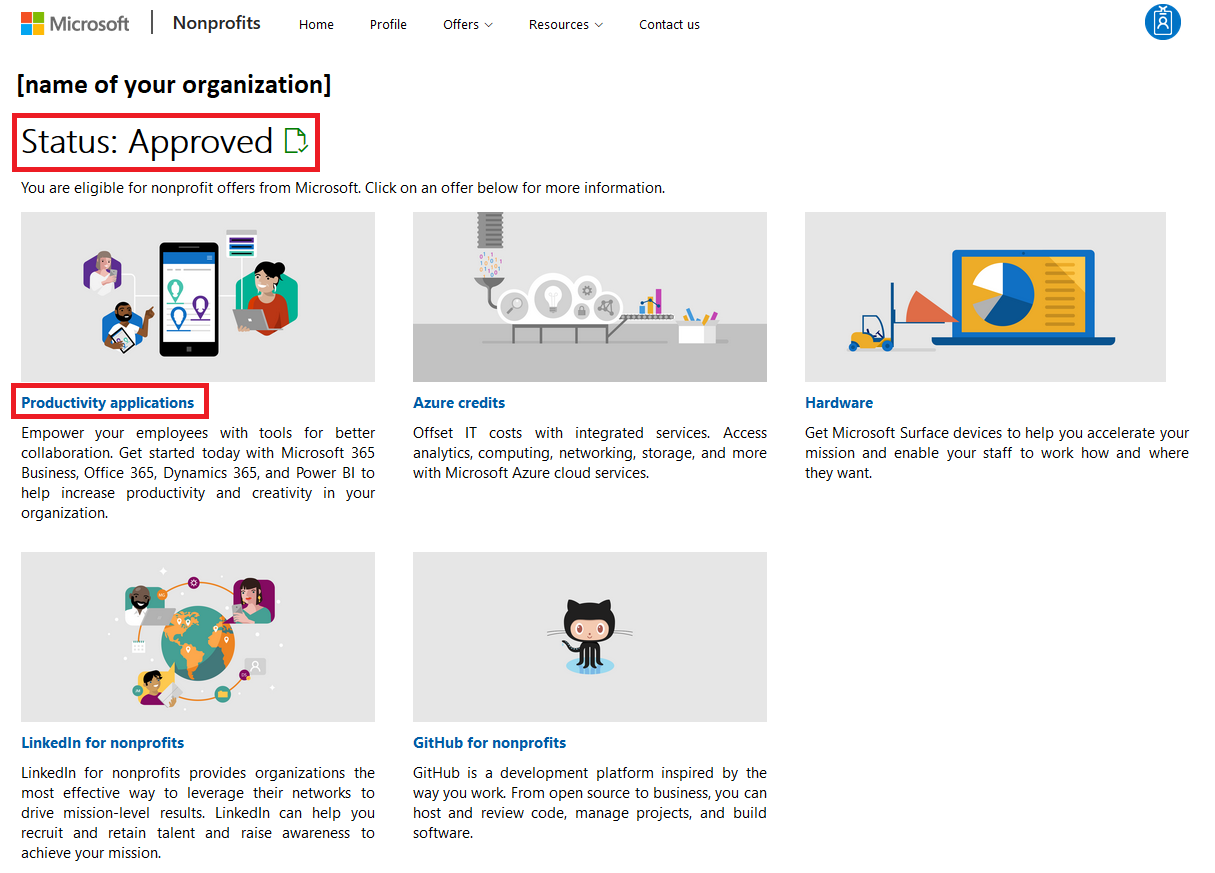
After that you have access to the Microsoft nonprofit portal. With that access you get your nonprofit licences. You can see them in your admin center.
Here is a quick overview over the next steps you need to take to actually use Office 365:
Once you are in the nonprofit portal (where you can always check the status of your organization), click on “Productivity applications”
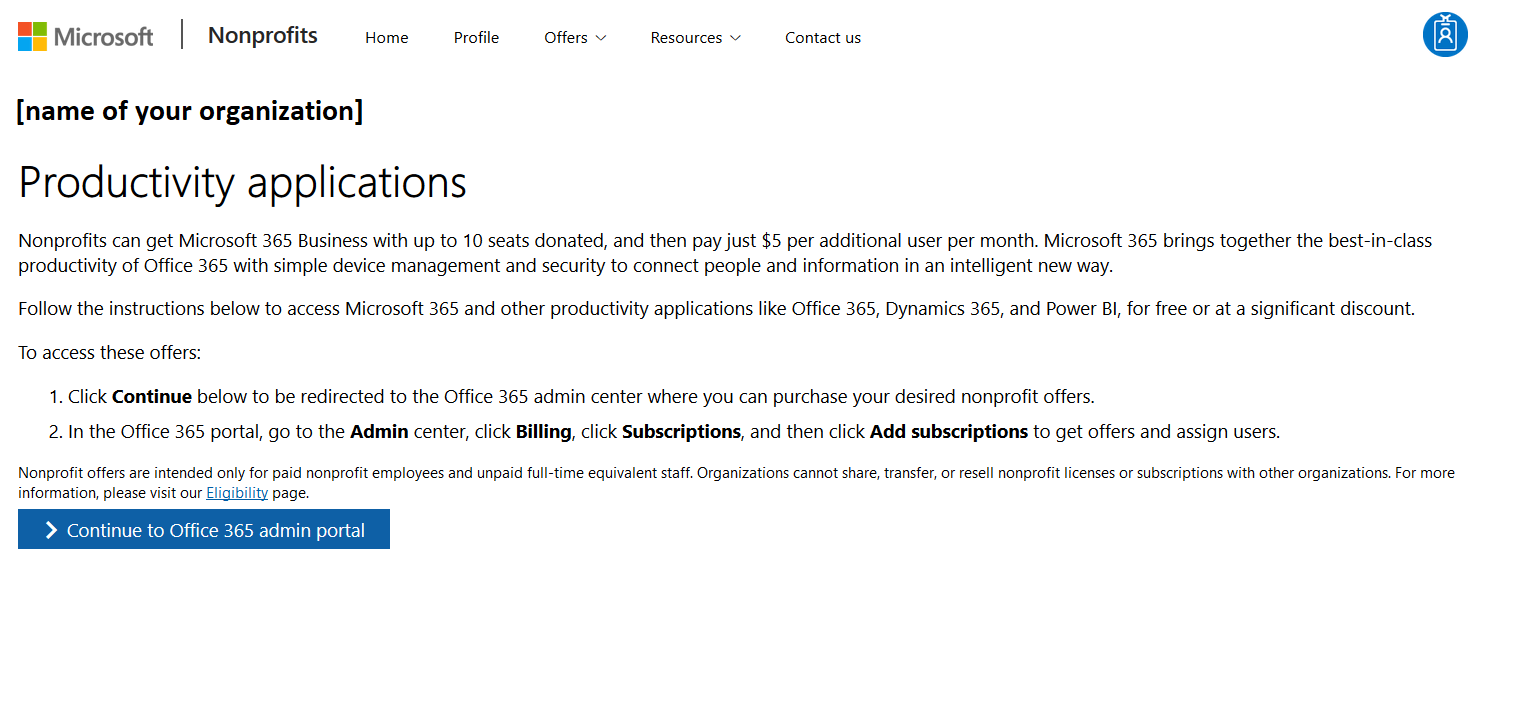
Click on “Continue to Office 365 admin portal”
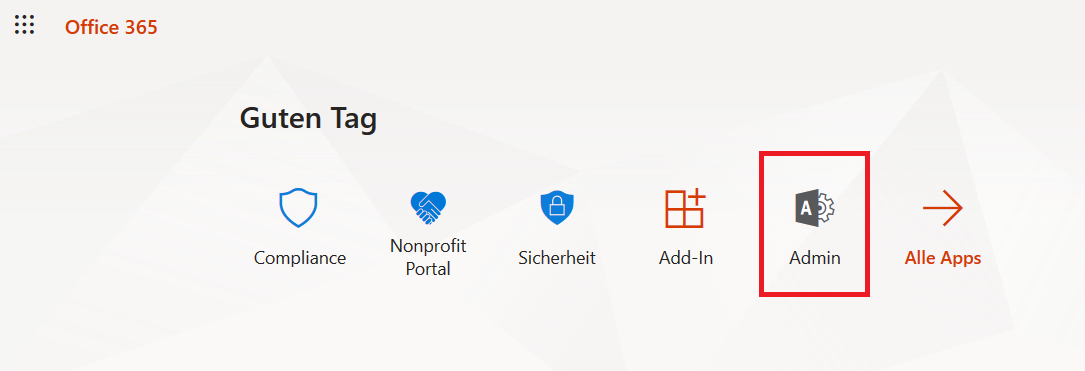
Click on “Admin”
In the admin center you can click on “billing”, “subscriptions” and “add subscriptions”. There is a special tab for nonprofit and commercial plans at the top. Make sure to be in the right one.
3. Get the right licenses
Basically, there is a differentiation between big and small nonprofit organizations:
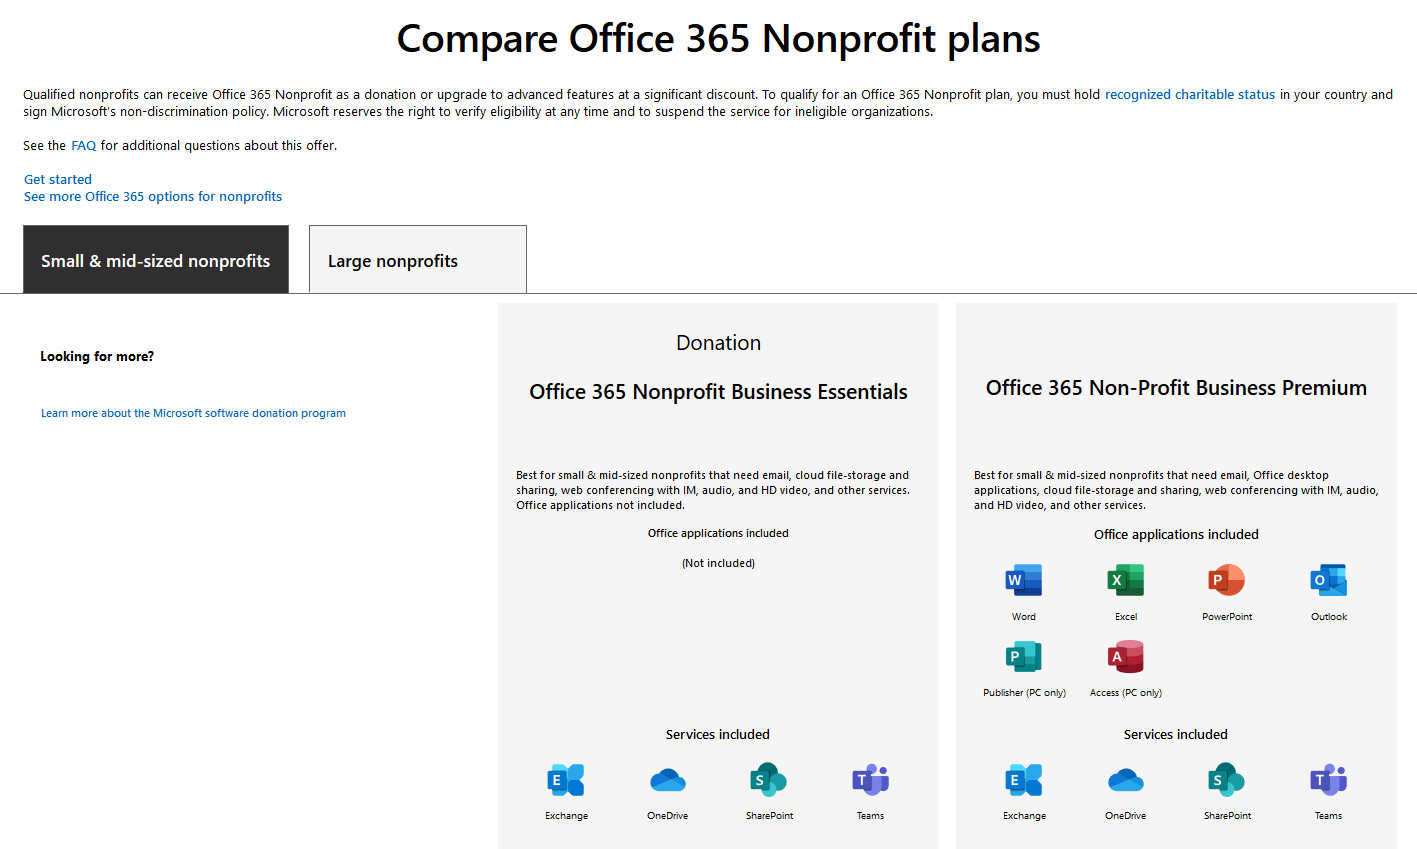
Small & mid-sized nonprofits
- Office 365 Non-Profit Business Essentials
- Office 365 Non-Profit Business Premium
Big nonprofits
- Office 365 Non-Profit E1
- Office 365 Non-Profit E3
- Office 365 Non-Profit E5
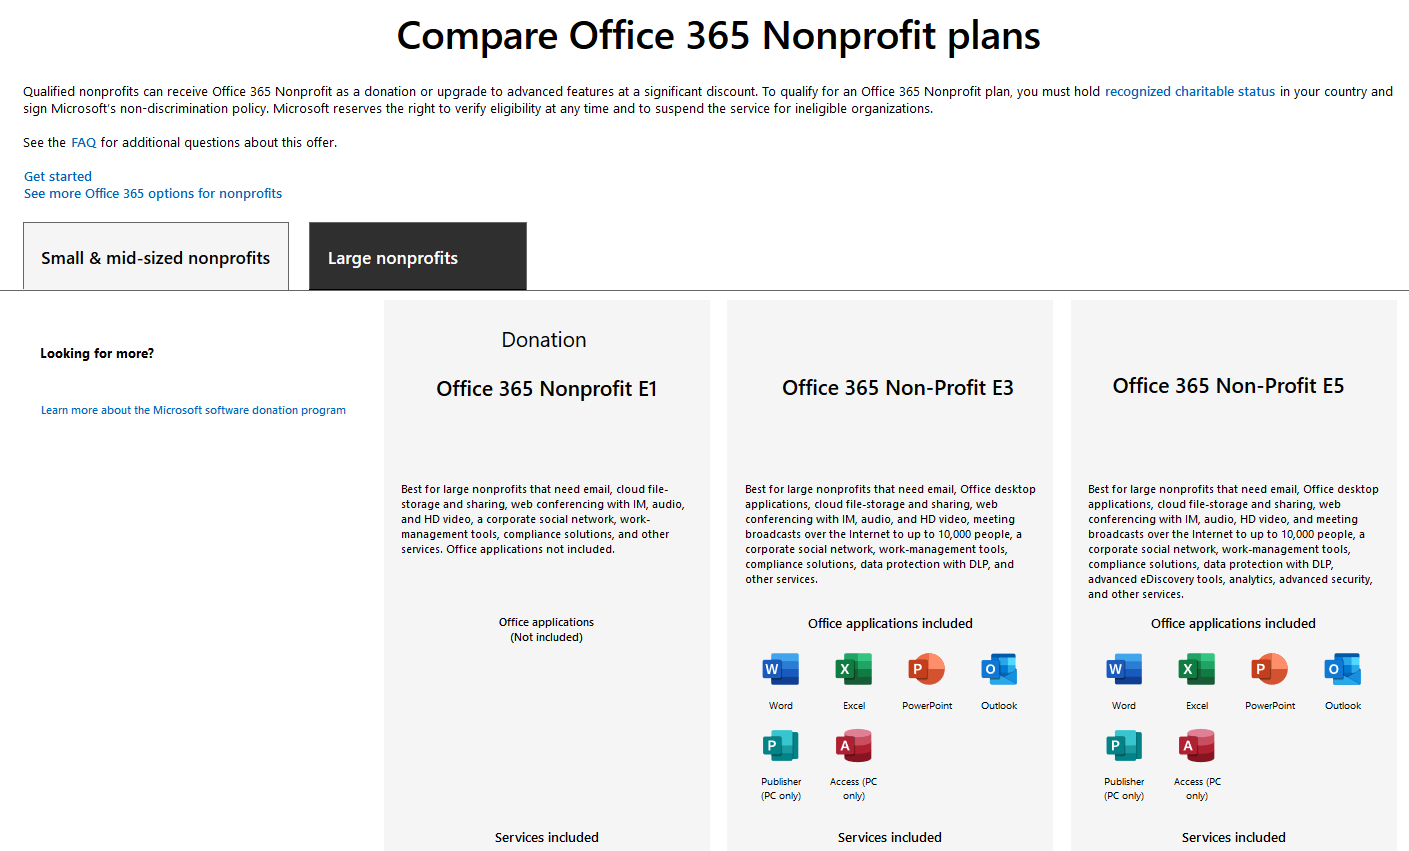
Many of you may know the Business Essentials and Business Premium licences from their private tenants. The E1–3 licences can be compared to their non nonprofit counterpart, so most of them are pretty familiar.
Check this page for a detailed view of what the licenses include.
So, in fact you can narrow it down into three options:
1. Get the basic package with the webversion of the office apps
2. Get the business package with mostly everything you need
3. Get the big business package with everything you need plus PowerBI
The interesting fact is, that the first option works on a donation basis. That means, that you don’t have to pay for it at all. And that can be very helpful, especially for nonprofit organizations.
In my case I bought a few Business Premium licenses for the few guys working with our PC. All the other members, who are involved but not necessarily core staff can easily work with the E1 or Business Essentials licenses.
My hint for you: Make a plan what kind of licenses you need. Honestly, sit down with a piece of paper, make a list of members (or groups) and evaluate what kind of licenses these members really need. Then you can customize your license model the way you need it 👍💡
That makes it very affordable for nonprofit organizations to get into the Office365 world.
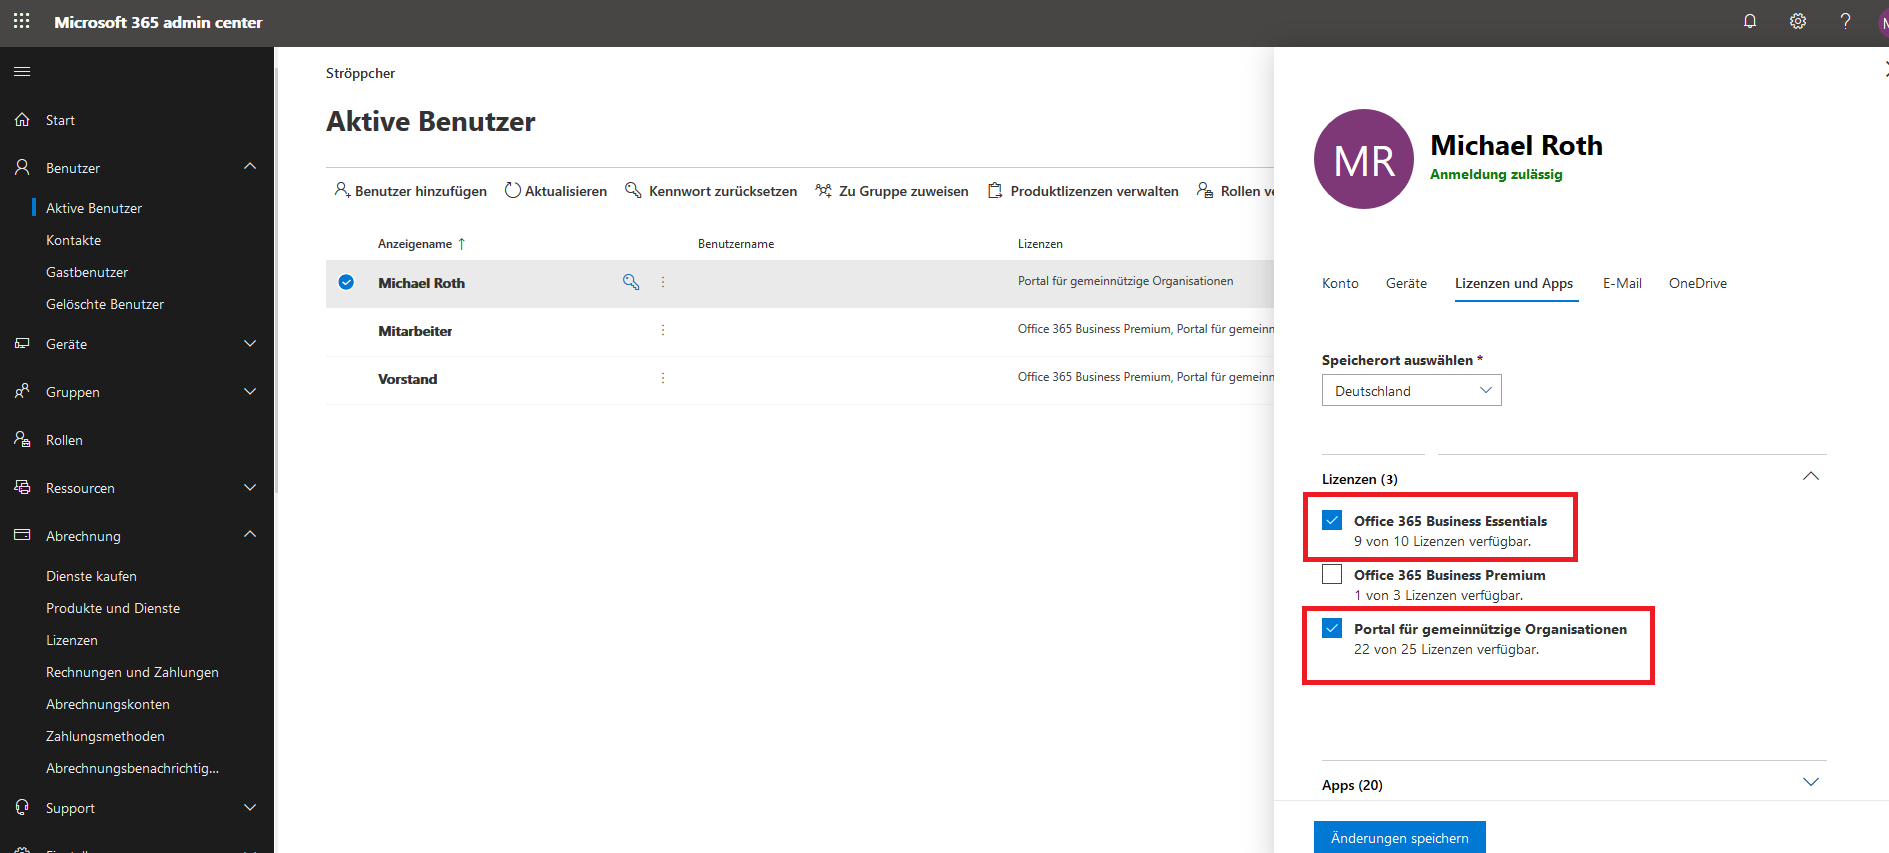
Important: You need two kind of licenses. One of the licences described above and those special “Portal for nonprofit organization” licenses. These will grant you permission to buy the special offers but won’t give you any access or apps whatsoever.
You have to activate both for every user you have. More on that in chapter nr. 4.
4. Add licenses to your users
If you start adding licenses to your users, be aware that all users have to get a “portal for nonprofit organization license”. You will find them in your admin center (billing à licences). These alone don’t give the user access to any app or Office Services. You have to add the user another licence (one of the licenses describe above).
So every user needs two licenses:
1. Portal for nonprofit licenses
2. Office 365 Business Premium License (or E1, or E3 or whatever)
This actually took me a while to figure it out 😉
So before getting frustrated and calling the Microsoft support (who helped me a lot with this), check whether your users have the licenses they need.
And that’s basically it. The rest is common Office 365 Admin stuff and user management. Set their password and email it to them so that the users can start working.
That is, where the fun part begins 😁
If you have any questions regarding the nonprofit licenses (or difficulties, or comments, or anecdotes, or corrections) please contact me on twitter (@Gezeitenbrand) or LinkedIn (https://de.linkedin.com/in/michael-roth-handsomeguy).
I would like to hear your thoughts on that.
In the next article I’m going to build an efficient time tracking tool based on SharePoint. Stay tuned.